'One Push' Traverse 16th - 20th September 2016
Warning - This is an anecdotal account of an Exmoor Coast Traverse attempt in 2016 and is not a climbing guide to the route.
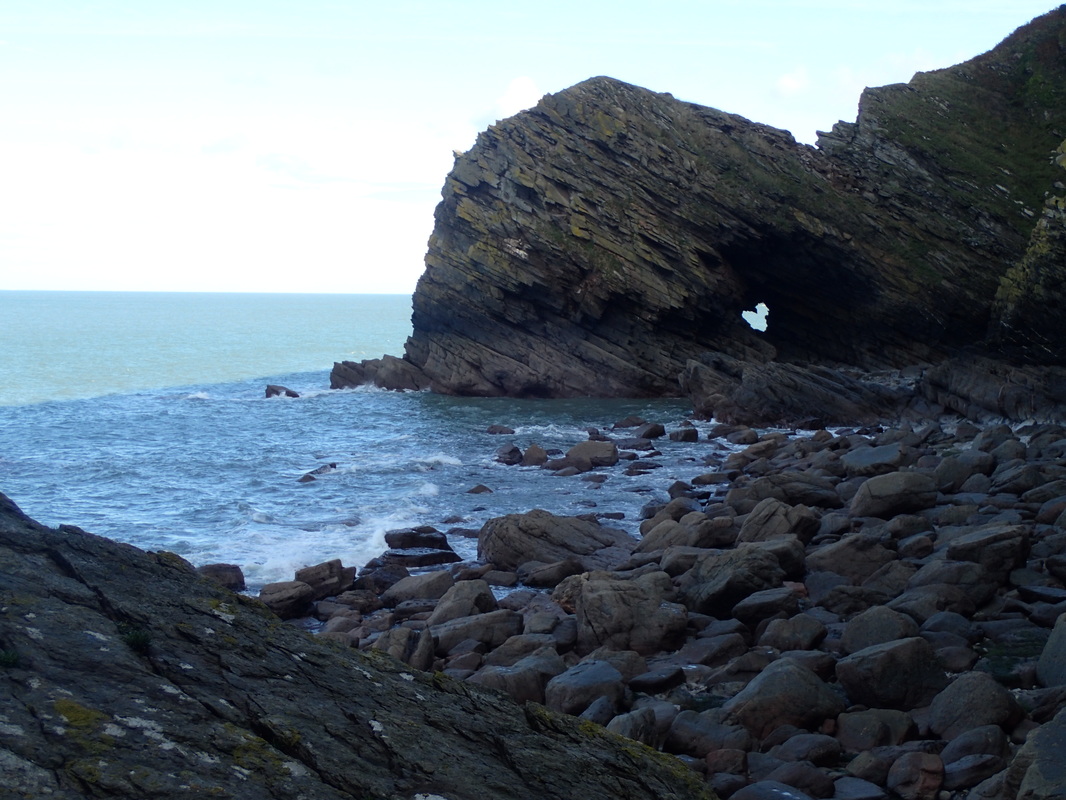
I first became interested in the Exmoor Coast Traverse a few years ago when I came across it searching the internet for multi-day climbing adventures, having just enjoyed the Cuillin Ridge. At that point, time spent in the mountains was starting to decline in favour of the sea cliffs and those in the South West in particular. With this in mind, for a VS level climber, the Traverse seemed the perfect outing; other than the fact it seemed to get mentioned more than done and the only detailed information available regarding a prior 'one push' traverse was the inspirational account by Terry Cheek which set out a pretty clear picture of what a serious undertaking it was.
|
|
It rolled around in the back of my mind for a couple of years while I got some other things done that had been on the list a while longer; occasionally introducing it into conversations with climbing partners to see if it generated any interest – not so much. That changed in February when away ice climbing in Cogne, over a beer I floated it to Harry with a bit more purpose and we pored over the account of the first ascent, concluding it was right up our street and we needed to get on it this year,...dedicating the climbing time we had available until it was finished. Harry’s friend Andrew committed to the route and that gave us what I believe is the minimum team size needed to tackle it.
|
|
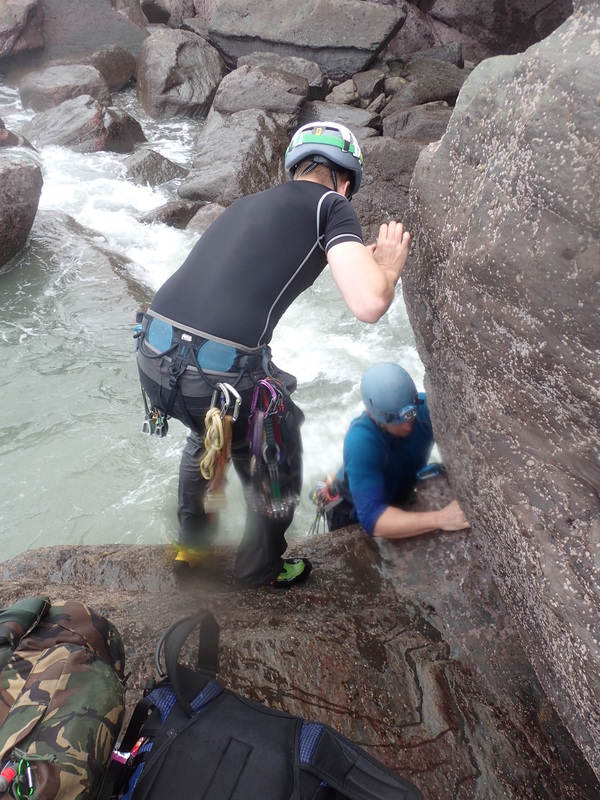
We bought Kester Webb’s book The Hidden Edge of Exmoor and pieced together the wealth of information regarding key geographical features with the help of Terry Cheek’s account and the OS map. This gave a good overview of the main milestones and obstacles along the route, though it soon became clear there was a lot more complexity involved that would have to be unraveled on the ground. Much of our first weekend on the Traverse was lost to that realisation, the inevitable ice axe assisted exit and some soul searching regarding my own ability to attempt a one push crossing - having experienced the seriousness and inescapability of the terrain.....as well as its impact on climbing composure when coupled with an incoming tide.
|
|
More time on the Traverse built confidence though and the appreciation that, armed with enough time and bivvy kit, safety didn’t always have to mean leaving the route, just the ability to get away from the sea before moving on again. While this mentality led to some significant non-productive time spent on ledges, it revealed more of the route to the point we felt able to go for the one push attempt in September. Noting, for better or for worse, that we had focussed all our familiarisation efforts on the first half, thinking that was where the significant challenges lay. That and the fact we believed the further we got, the more a growing determination to finish would see us overcome the remaining obstacles without having encountered them before.
|
|
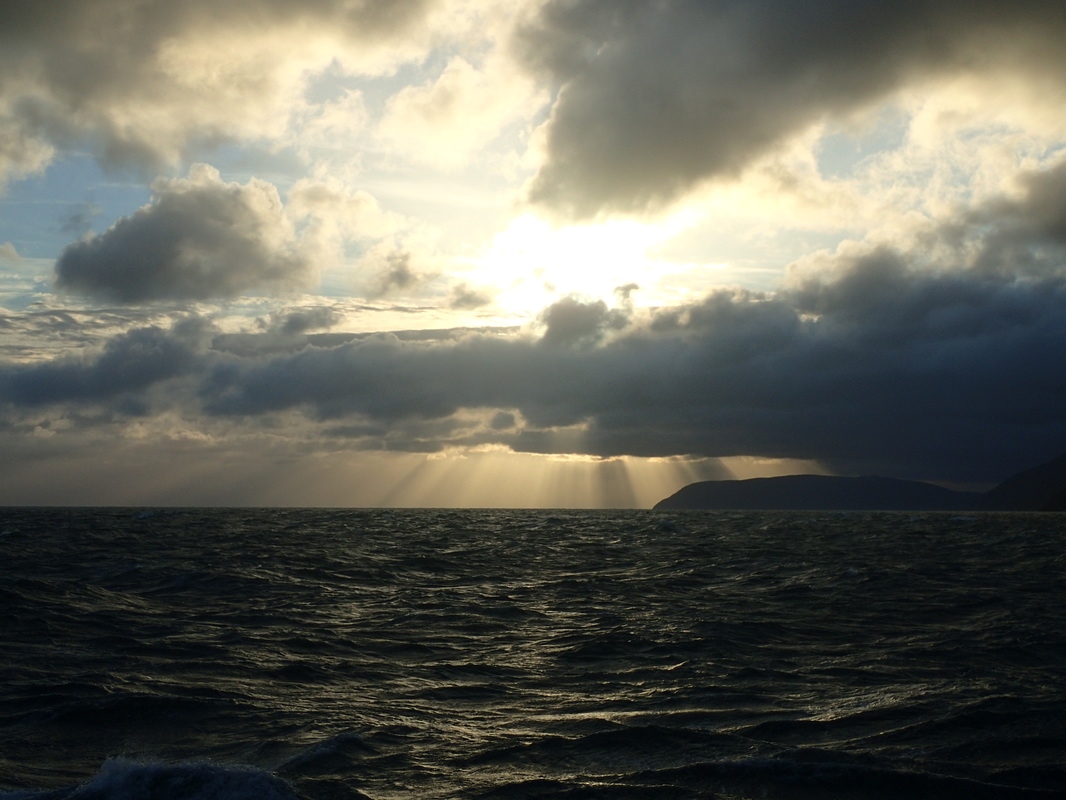
September the 16th to the 20th offered great tides and a full moon. We felt good about the first two legs and convinced ourselves that the lower tide would see us overcome the challenge of the ‘watery corridor’ that had defeated us once before. We booked the time and crossed our fingers for the weather. We had no support group though told the Coastguard our plans - and our wives and partners not to worry but we would be out of touch for a few days. On the Thursday night we parked up on the top of Countisbury Hill and listened to the wind howling round the van, convincing ourselves that sea conditions would remain manageable.
|
|
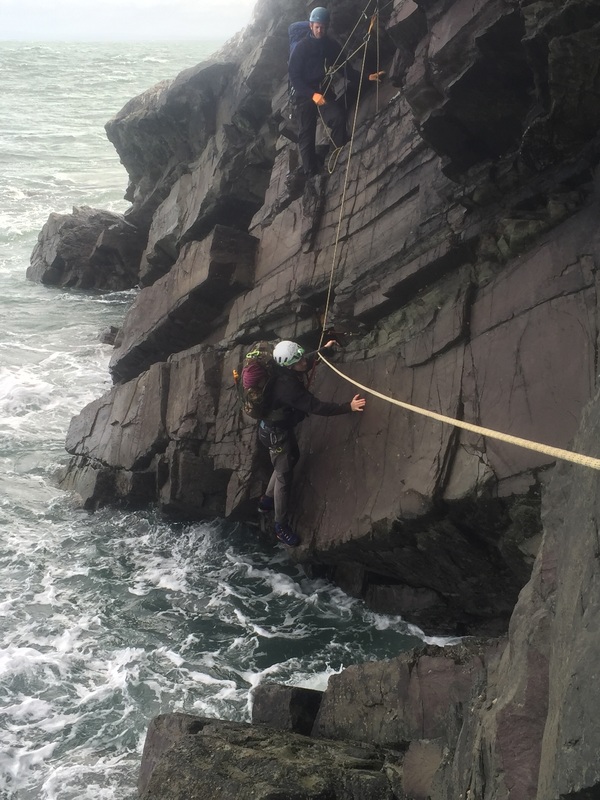
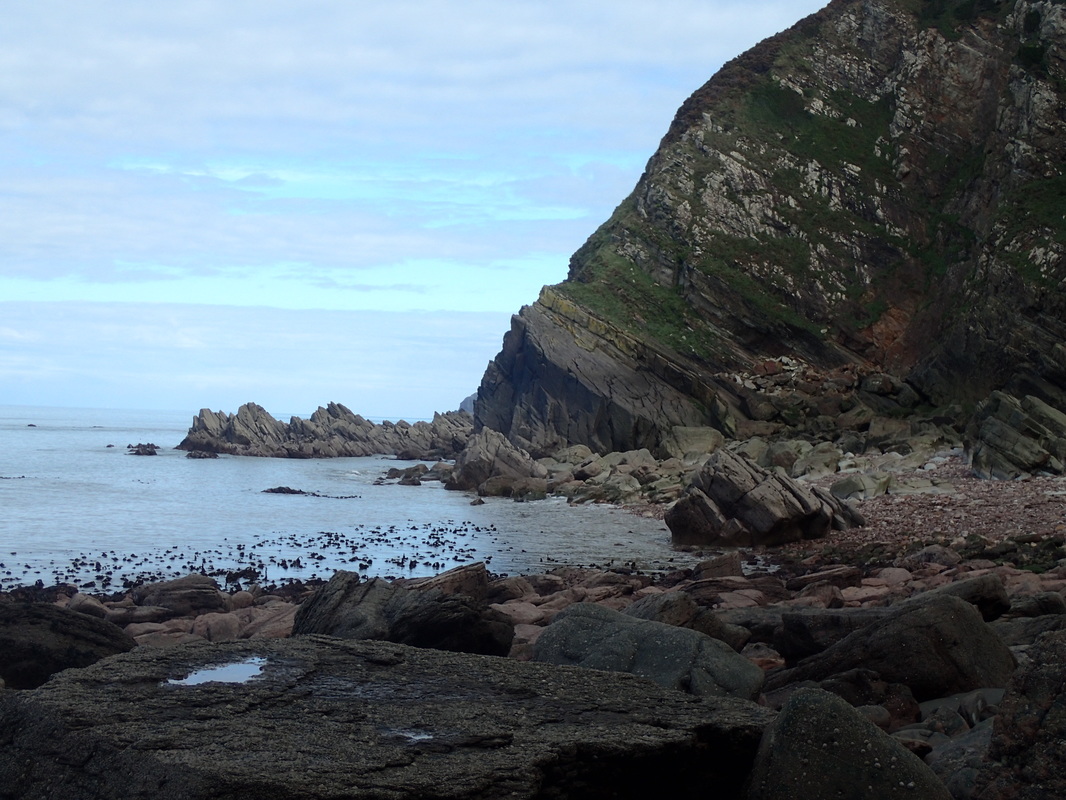
At 630 the next morning we were sat by the sea at Foreland Point and the opening sentence of Terry Cheek’s account ‘Goat Rock, Foreland Point. We were already in trouble. There was a large swell, we were unable to start’ was written large in my mind. It’s possible to start just after high tide from Foreland point and maximise the time available for the section, but the large swell was holding us back…..and having crossed the East Inlet and Mother Meldrum’s Gut before…..we knew what this could mean later in the day. The first part of the route to Lynmouth was straightforward - a couple of climbs, one tricky, a lower and an abseil – though it was becoming clear the sea was much livelier than we had experienced on our previous trips.
|
|
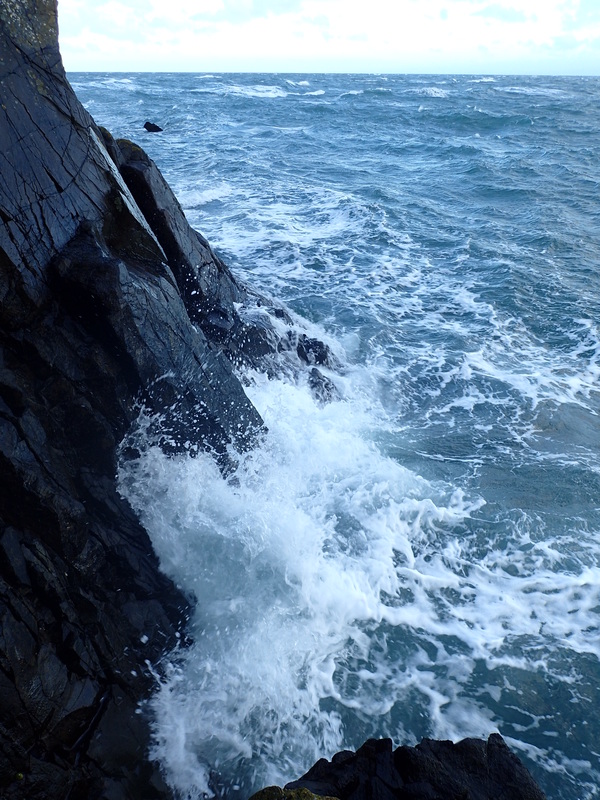
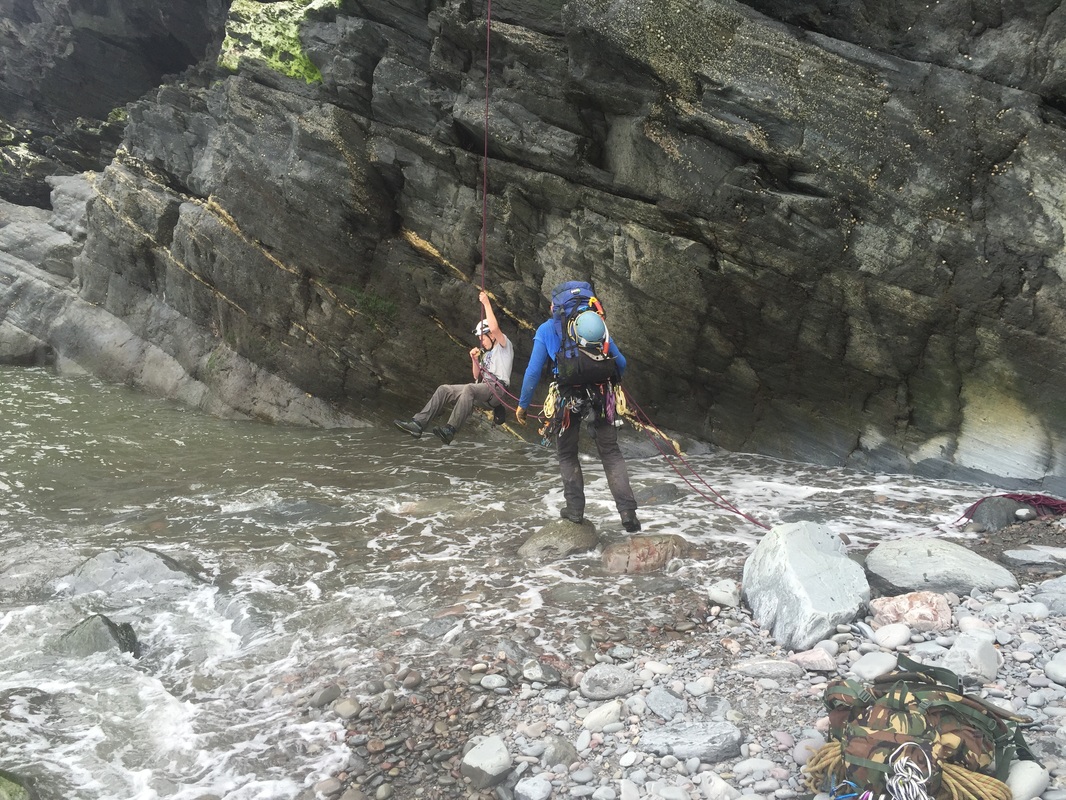
The late start washed through to a late arrival at the East Inlet. We arrived after low tide and the base of the inlets were awash with swell and foam. The East Inlet has to be crossed via a bold E1 - that looked every bit of that, though the grade is above me – a wade or a Tyrolean traverse. The E1 looked desperately smooth with next to no gear and as the time for attempting a wade had clearly passed, we settled down on the ledge above the inlet and waited for the water to rise to tackle the Tyrolean. By half tide our ledge, a safe haven at high tide on a prior visit, was now being hit with spray from the crashing waves and we were forced to retreat to higher ledges above the East face of the Inlet. I’m a big fan of getting in the sea, but it was clear from the foam and the four metres of rise and fall of the water against the cliffs that getting in would be a lot easier than getting out. The ledges we had used to rig the Tyroleans before were now regularly submerged.
|
|
Our choices were narrowing, either hope the sea settled and abseil into the Inlet in the dark at low tide, taking the wade then crossing the mouth of Mother Meldrum’s Gut to tackle the ‘VS’ pitch….accepting that if anything went wrong with the climb we would need to take refuge in the back of the Gut until the next day……or if the route around the corner proved to be trickier in the dark than we remembered it to be in the light….then we would be stuck on ledges that unlike before, would not be above the sea……or, temporarily leave the route.
|
|
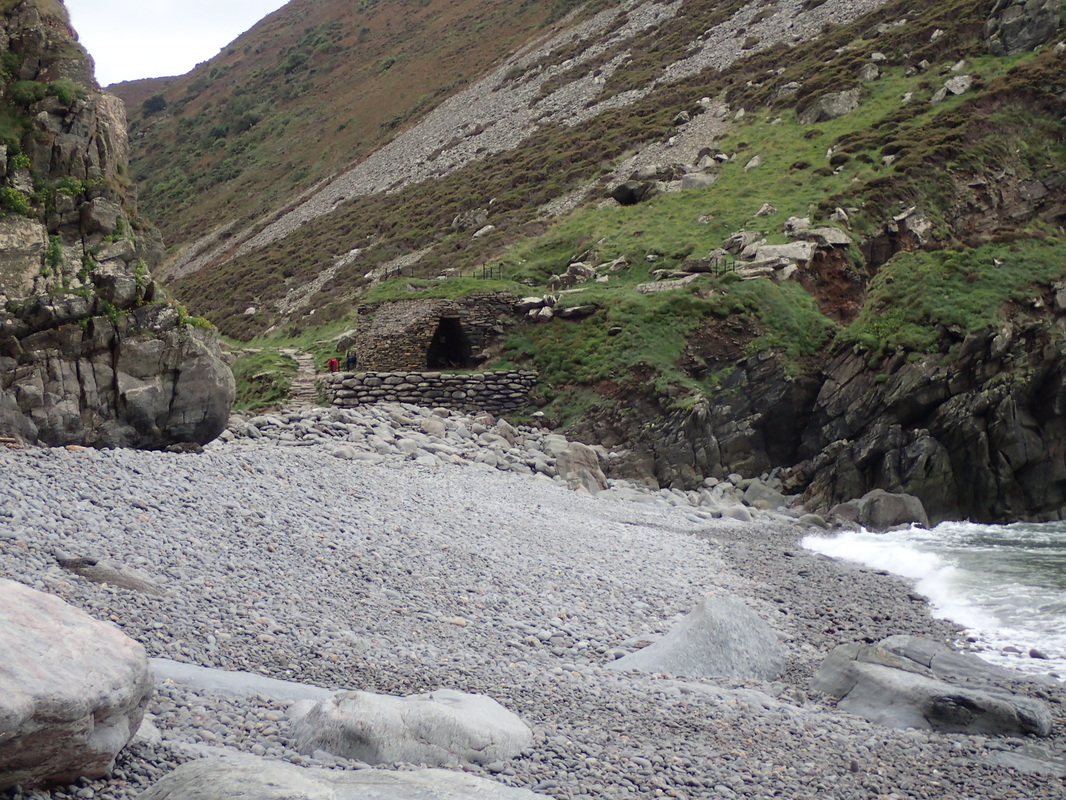
Unpalatable as it was, looking at the sea we had to accept that the ‘either’ option had moved into the unjustifiable bracket and to keep our Traverse attempt alive we needed to exit above the East Inlet and re-join at Wringcliff Bay. We had crossed the omitted section before and knew how to overcome it, though knew it meant whatever the outcome now, we could not lay claim a ‘clean’ repeat of the 1978 crossing. Earlier in the year we waited on the ledge in the sunshine, having resigned ourselves to abseiling into the Inlet in the dark in calm seas, when it became clear the rising tide would neatly link ledges across to the West wall of the Gut and allow a crossing with two Tyroleans. Then, after 50m of high tide ledges, we waited for near low tide again to abseil into Dog Hole before crossing the long stretch of boulders leading easily to Wringcliff Bay.
|
|
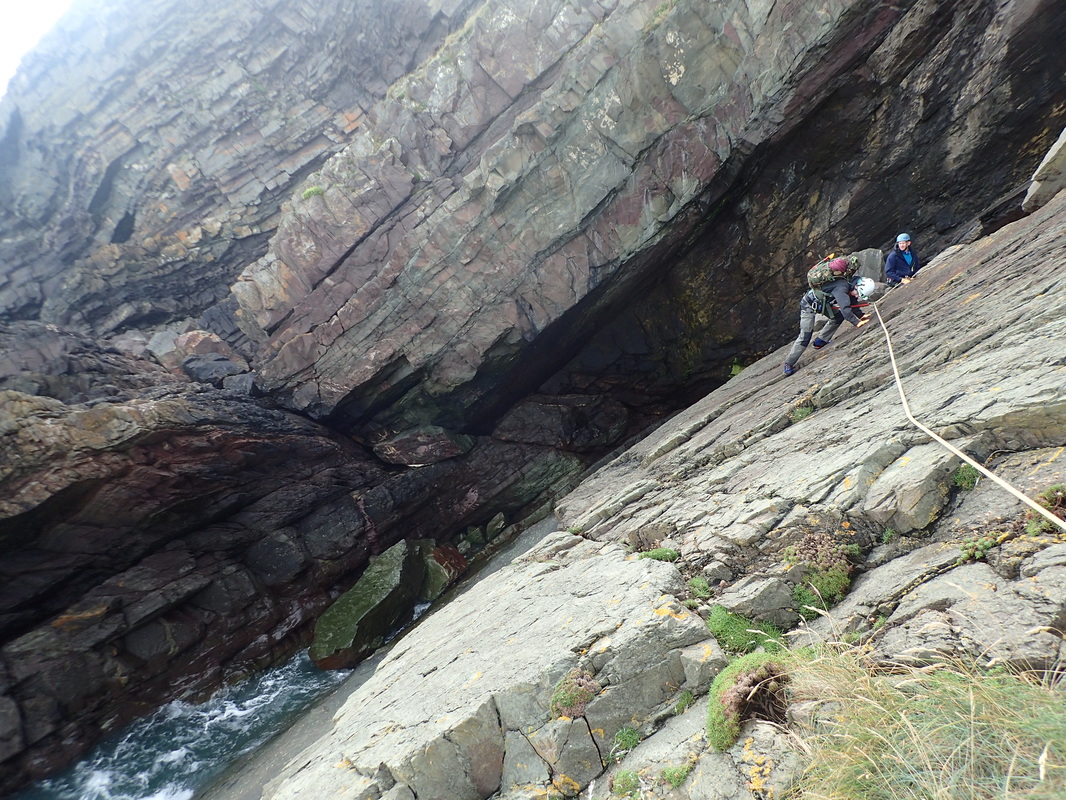
Not this time though. Two pitches on deteriorating rock, both requiring an ice axe to top out on the grass above, got us on a grassy ridge between the Inlet and the Gut – from where we looked down on the small refuge at the back of Mother Meldrum’s Gut…..filled with debris detached from the base of a large overhang high above….and then upwards through gorse to gain the North path of the Valley of the Rocks. As we made camp on the beach, we put the experience down to part of the adventure and committed to press on.
|
|
We awoke in the morning to more settled weather and a calmer sea. We knew that a successful day two depended on keeping up a good pace to ensure we got through Wringapeak before half tide and reached Big Bluff; where we planned to wait again before abseiling into the through cave at low tide at night - to clear this choke point and continue on to Hollowbrook Waterfall in the dark if we could. We had attempted this move to Hollowbrook once before, though felt unable at that time to commit in the dark to the steep rising traverse on Great Bastion - that requires regular readjustment to your line to avoid going too high. As a result, we had spent a poor night amongst shattered rock at the back of the gulley between Big Bluff and Double Bluff.
|
|
The day started well and we soon cleared the climbs at Duty Creek and Crock Point, with some additional short, steep steps passed en route. With the main difficulties cleared, we covered ground quickly across beaches, past Woody Bay and under Martinhoe, until ledges steepened on the run up to Wringapeak. The tide was lower than before and we were able to pass easily through the hole in the peninsula to reach the bays on the other side. Here the tide allowed an easy passage across boulders to Big Bluff where we made camp by the abseil hole and awaited low tide.
|
|
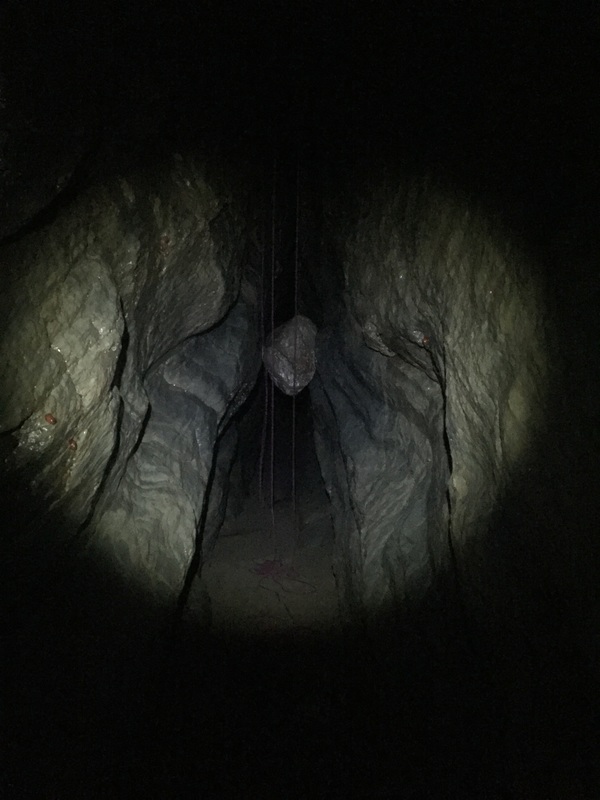
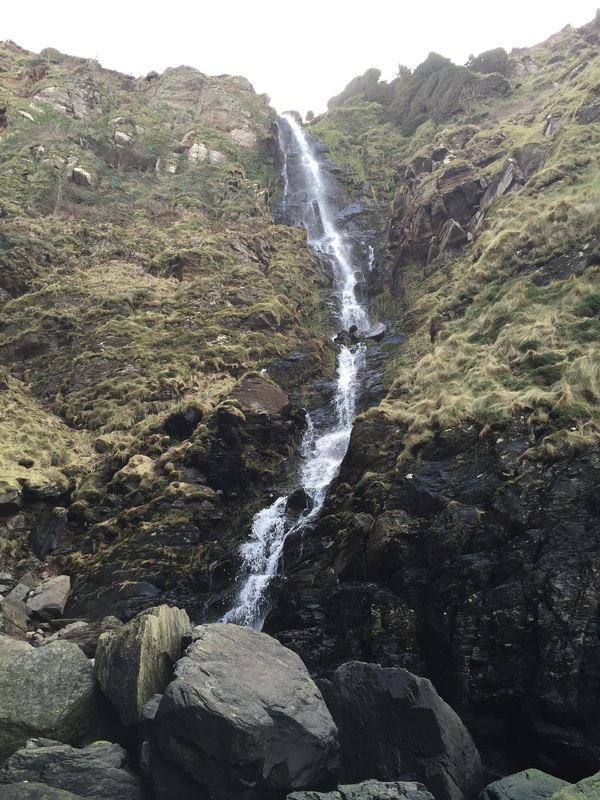
After night fell, the through cave cleared and we abseiled in just before low tide. We waited for the cave mouth to clear before walking out and entering the cave through Double Bluff opposite. The sea had moved boulders around at its exit and left a deep pool there, so we doubled back to climb the large smooth boulders and ledges at the front of the Bluff to reach Great Bastion. Here the tide was low enough to gain ledges on the seaward face from near sea level on the North East corner and a straightforward traverse led around into the bay containing Hollowbrook Waterfall. We made some space to Bivvy and settled down for the remainder of the night.
|
|
The next day conditions improved again and we packed up ready to move on as soon as we could….determined to arrive at the ‘watery corridor’ under the Flying Buttress at before low tide. Having been previously beaten there, arriving later than planned after a not particularly low tide, we hoped that the conditions would reduce the water level in the corridor to a point that allowed us to wade through and pick up rock ledges on the other side of the triangular through cave.
|
|
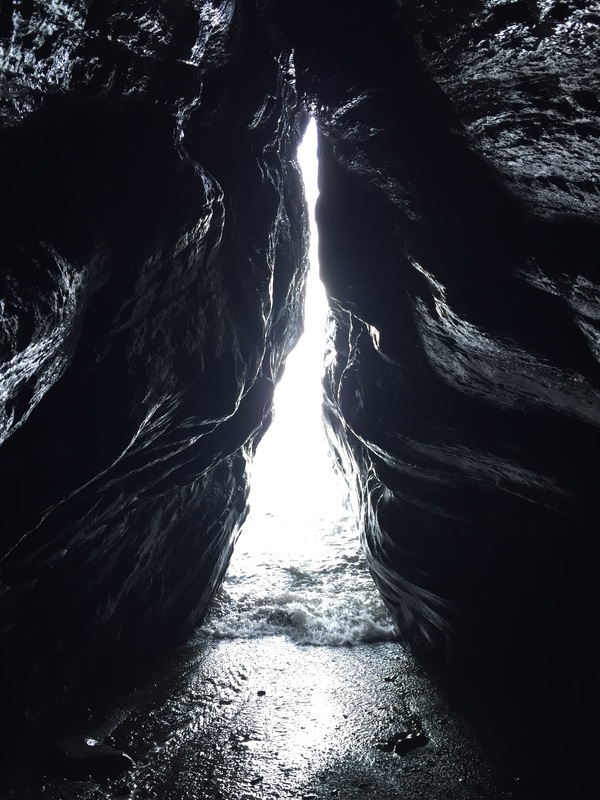
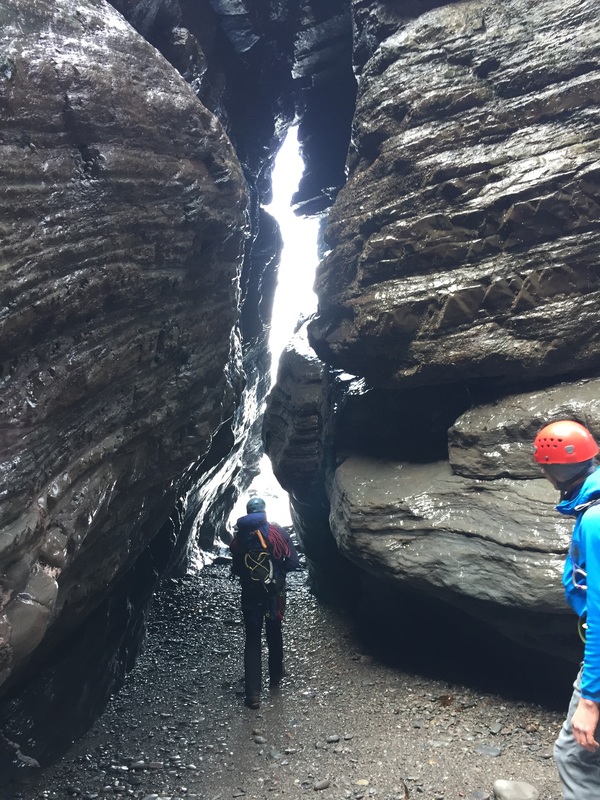
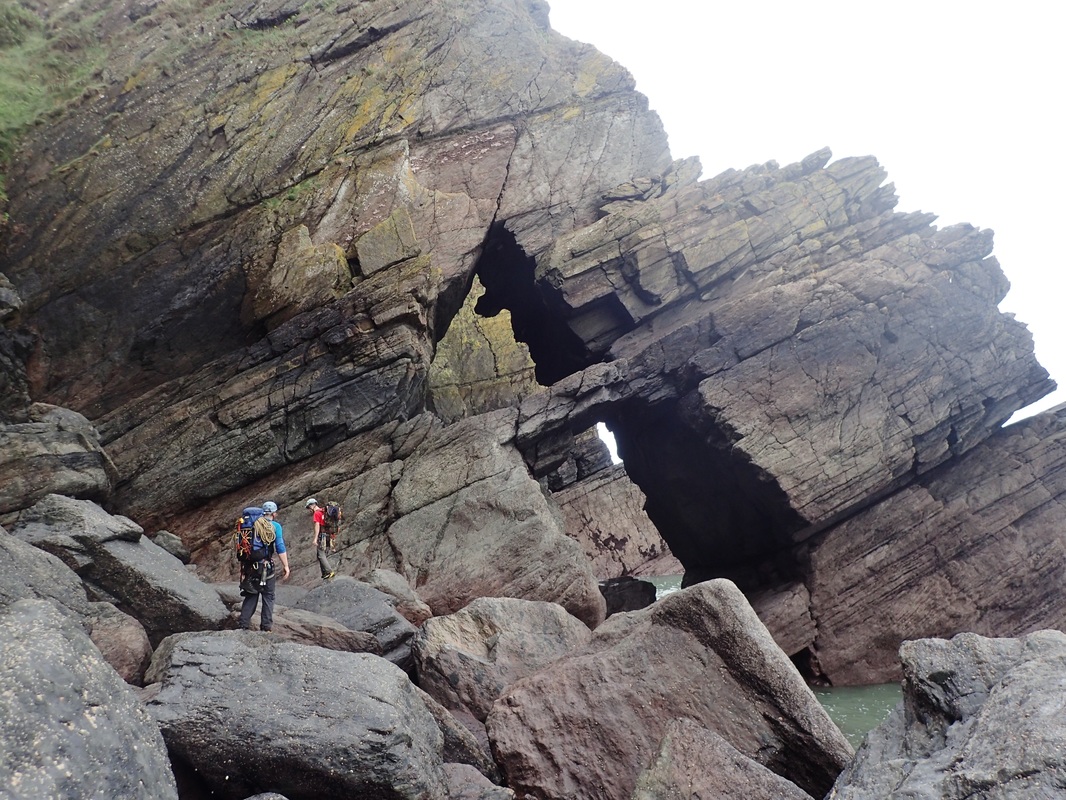
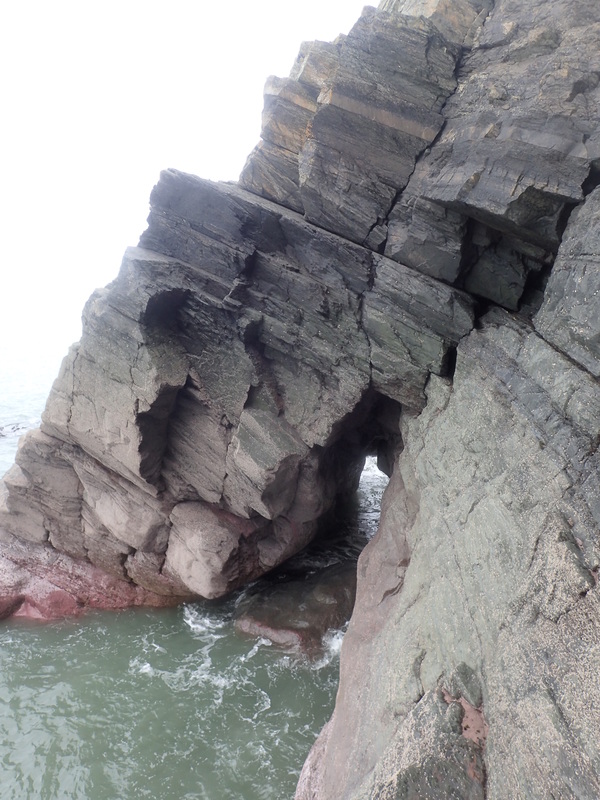
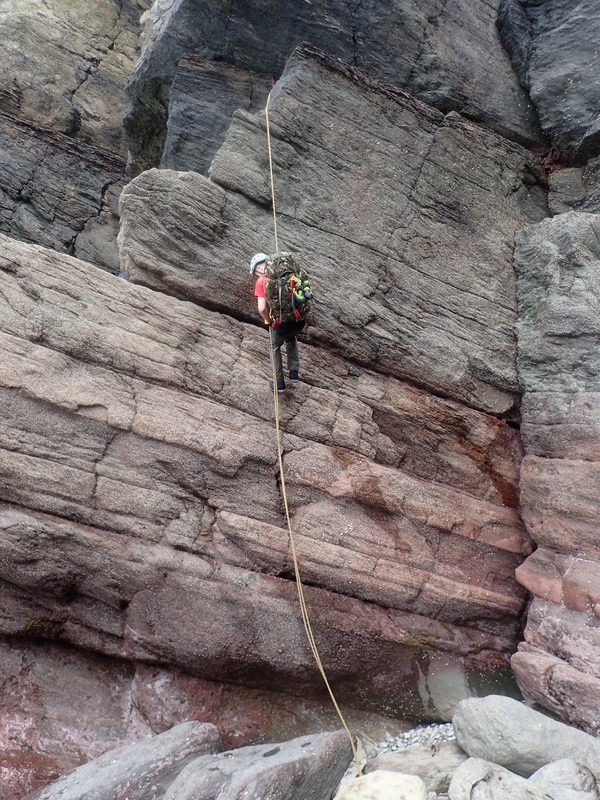
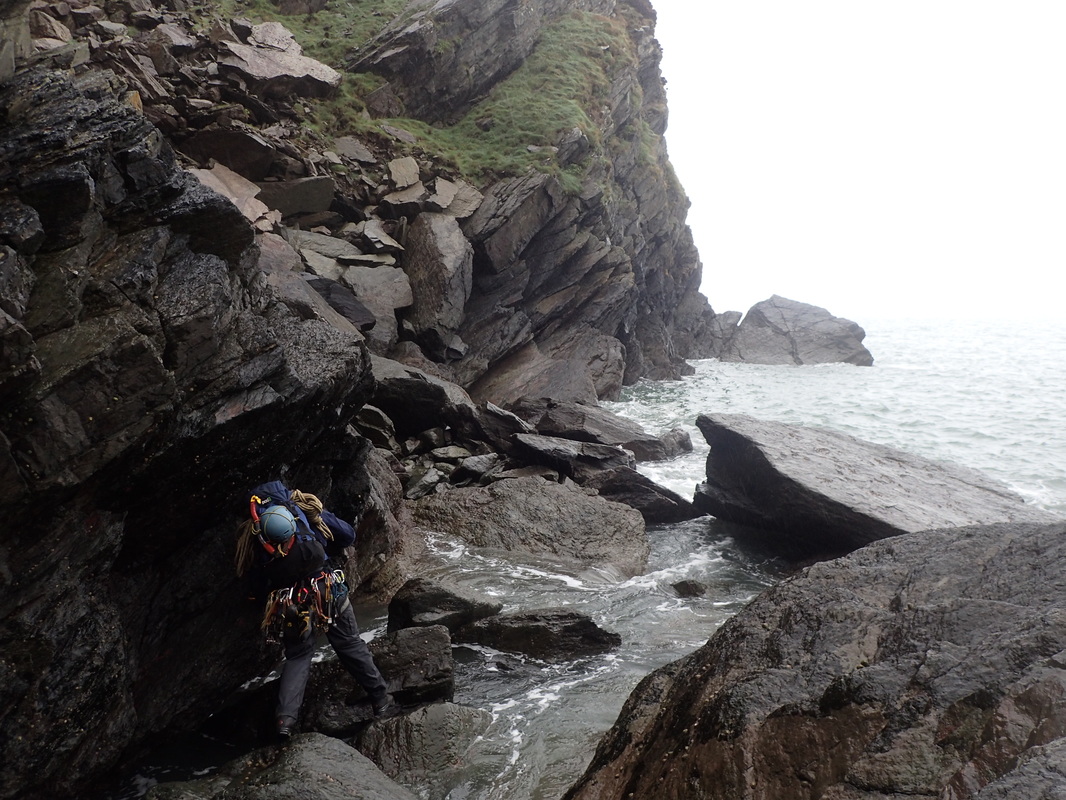
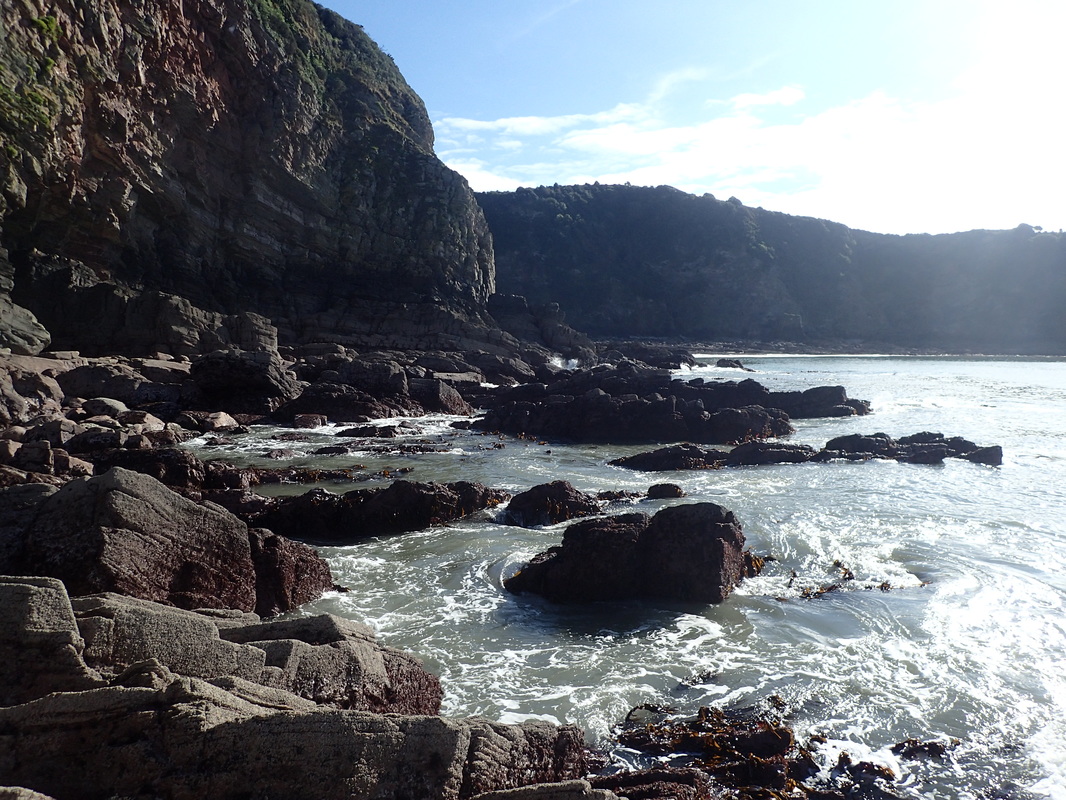
We soon reached the Black Wall and decided that the steeper cracks in the centre of the face looked preferable to the wide corner crack at the rear of the inlet. After a steep and committing start it soon backed off and we were on our way to the A Cave. We didn’t plan to attempt the stiff looking hand traverse with our heavy bags, rather to boulder hop under the span and then climb out of the lowest corner at the back of the square cut cave. With no boulders close enough to the corner to enable a hop, we knew that whatever happened we were going to get more than our feet wet, so decided to take the pain and gain time by crossing the water sooner. To keep the bags dry we set up a zip line for them from the span of the bridge to the low corner. Looking back, we realised that with our climbing shoes still on from the Black Wall we should have got stuck into the hand traverse without our bags and zipped them down to the other side of the climb, just as we had done when crossing the water. We cleared the cave and having descended smooth wave washed slabs around the corner, went under the Red Slide Buttress via the large and atmospheric through cave in the back of the bay, emerging on the other side to shortly come face to face with…..a very full looking watery corridor.

|
|
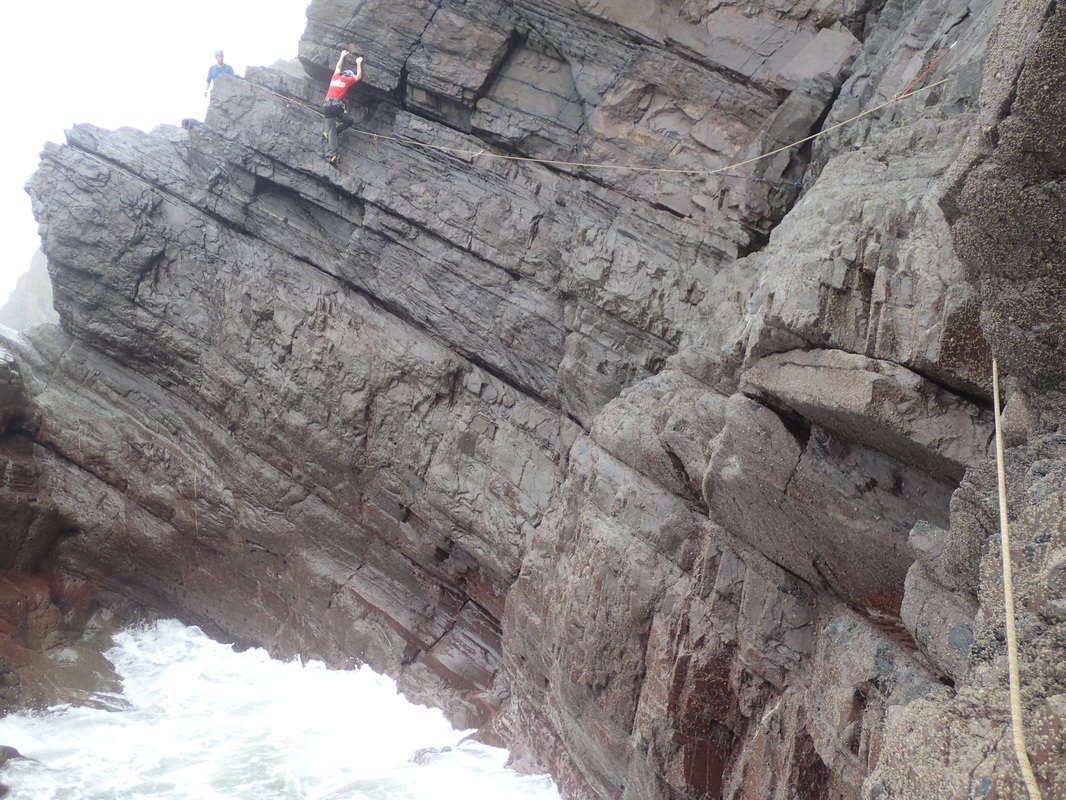
As we fought back the threat of a another failure on this section, inspecting the steep walls for a way up over the wave smoothed and undercut rock, we saw a couple in wetsuits swimming along the coast exploring the cliffs and checking out sections of the Traverse from the sea. Sympathising with our dilemma, they swam into the watery corridor to show us it was head height deep and confirmed there was no exit from its smooth, steep landward wall along its 30m length until after it went around the facing wall at its end, further out to sea. Their quick swim around the Flying Buttress did though reveal amenable climbing on the North face…..if we could just find a start on the East face.
|
|
We committed waist deep to the water with the swimmers very kindly giving the lead man a boost, to get us established and moving forward again....climbing the Buttress then traversing the cliff behind to reach a tricky step-through on the Claw. A quick abseil put us back on the beach and we made our way past Hannington’s Cave towards Heddon’s Mouth. We were just in time to avoid the difficulties that another half an hour would have brought, that we tackled when looking at this section previously from the direction of Heddon’s Mouth to the Claw. We were rewarded by a fantastic bivvy in an old lime kiln by the beach, with a great supply of water and drift wood. With this section cleared, based on the account of the first ascent, we thought there now had to be a good chance that we would make it to Combe Martin. It was forecast to rain that night and dry up by midday.

|
|
While we were warm and dry in the old lime kiln, it rained through the night and when we got up in the morning, it looked like the weather was set in for the day. Facing a section of which we had no knowledge, we knew we needed to get moving as soon as we could. Immediate difficult scrambling at high tide level over wet greasy rock set the tone for a fairly ugly day. We soon reached the section behind the Swim and tackled the climb – tricky in the wet on the West face to start. It was after Andrew had come across to join me on the lower belay, still six feet above the water, that we were hit by a freak wave that would have put us in if we hadn’t been tied on. It was the only one but were now soaked and getting cold.
|
|
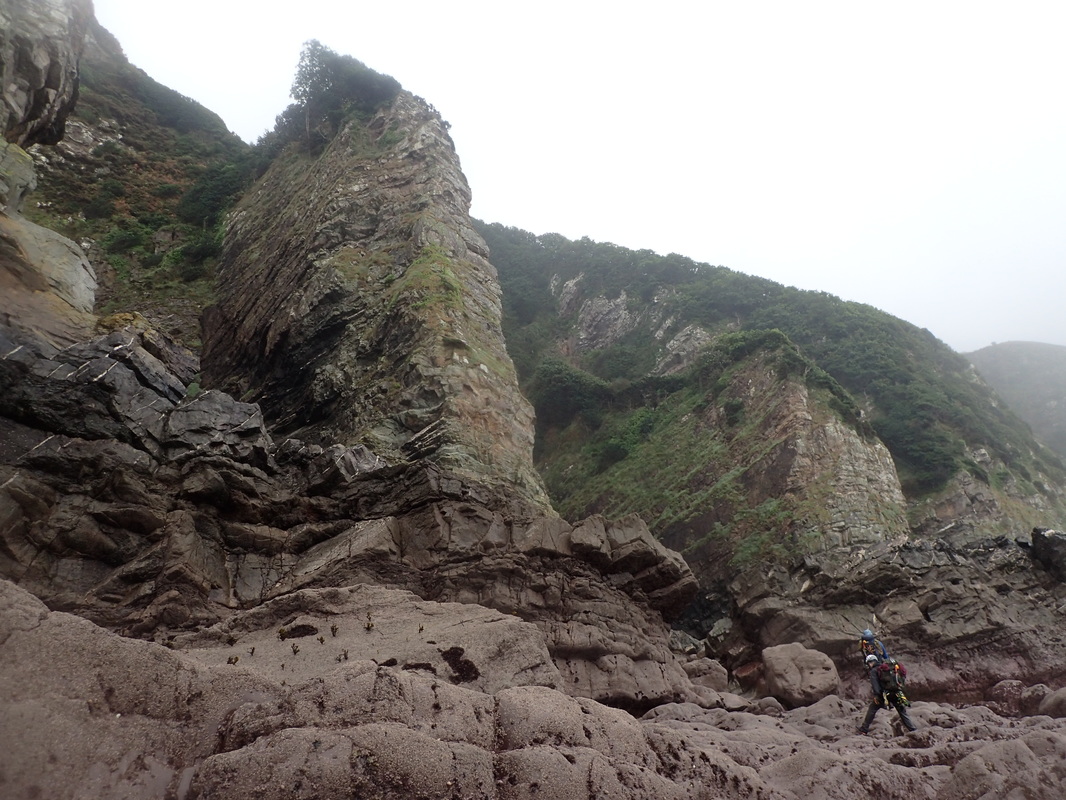
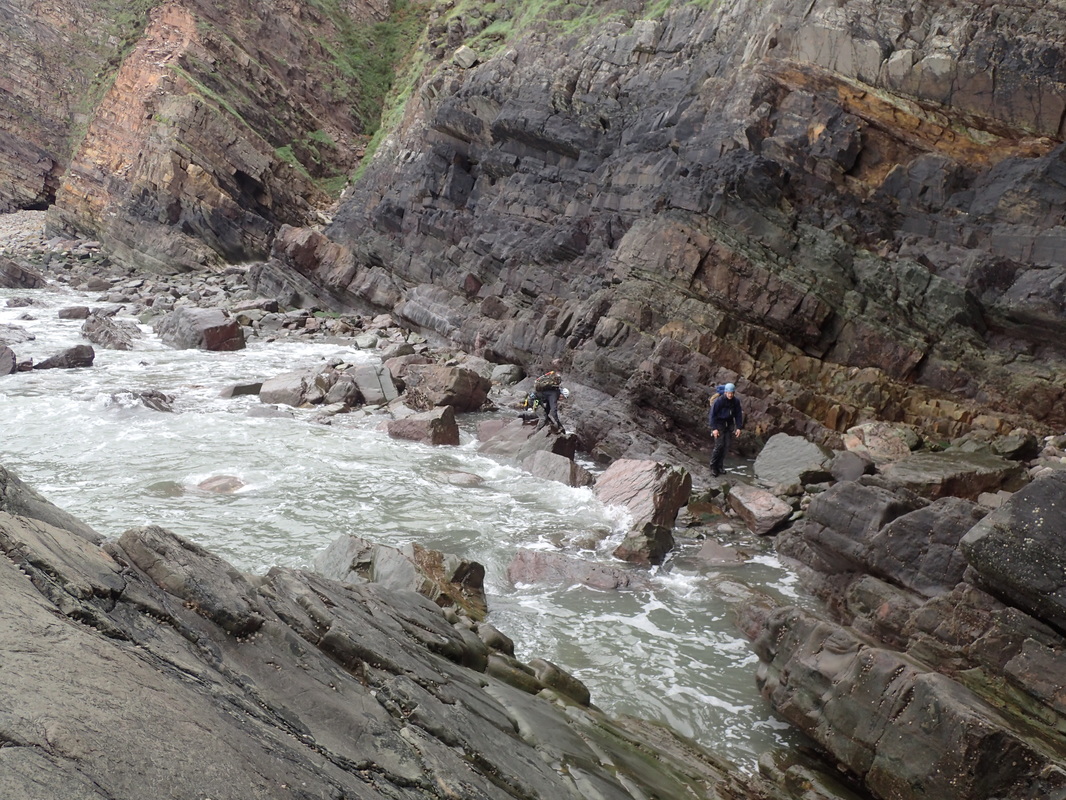
Anxious about what lay ahead we pressed on; concerned that we needed to cross North Cleave Gut at low tide. We made it, gaining the entrance of the Gut via some strenuous scrambling close to the sea, then continuing quickly in front of other buttresses to Neck Wood and then Holelake. Everyone in the course of the section taking some pretty unpleasant falls amongst the wet boulders – with the others thinking ‘please don’t be injured’ in the periods of quiet face pulling that immediately followed. Our plan was to reach Sherrycombe, though with the weather deteriorating we were ready to consider other options. Red Cleave was an alternative, though had little appeal - looking like a pile of unstable scree open to the sea….much like a number of the other possible refuges on this section. We kept moving towards Sherrycombe, reaching the wall that blocks access to the ledges that lead to the Waterfall, just as the sea threatened to engulf the lower part of it.
|
|
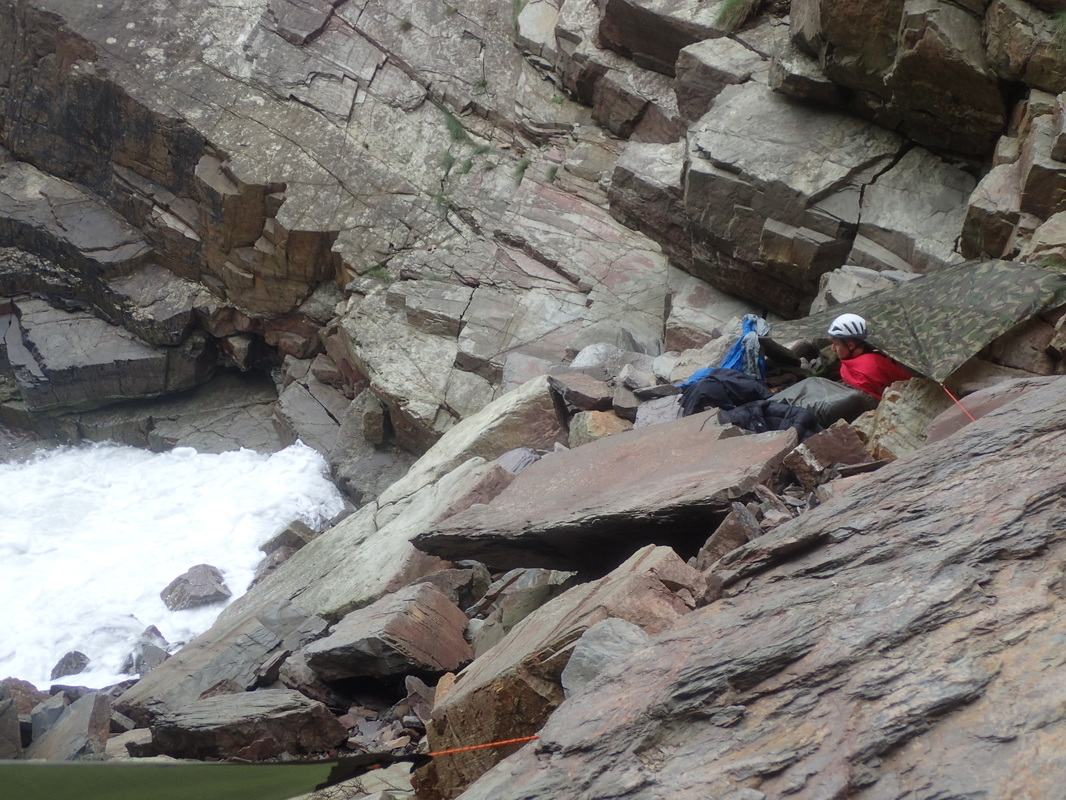
Once we reached the Waterfall, we knew we were going no further that day. Terry Cheek had made it another 1500m to Yes Tor on this leg, but after just seven hours on the go in the rain through unknown terrain in what felt like a continual race against time, we’d had enough. From the first account we knew Sherrycombe was the intended bivvy stop so anticipated a decent bay set back behind the protective sea wall - we were disappointed. The bay was another debris chute and terrain trap, with unstable rock preventing upward progress. Bivvy spot options were limited in the narrow band between the high tide mark and the start of the jumble of scree. We worked to clear spaces out of the firing line and set up tarps to get out of the rain.
|
|
While we were sat under a tarp and having momentarily taken our helmets off, Harry was hit on the head by a rock - mercifully fairly small, but big enough to send some blood running down his neck. Having re-grouped after that, we re-appraised our bivvy locations and I spent the night sat under a small overhang listening to the sea, that at its highest, was splashing our bivvy spots. It felt like next to no sleep was a better option than a rude awakening or worse. As we sat together under the tarp before settling down, the relentlessly positive Andrew summarised his feelings towards the day and we laughed a lot.
|
|
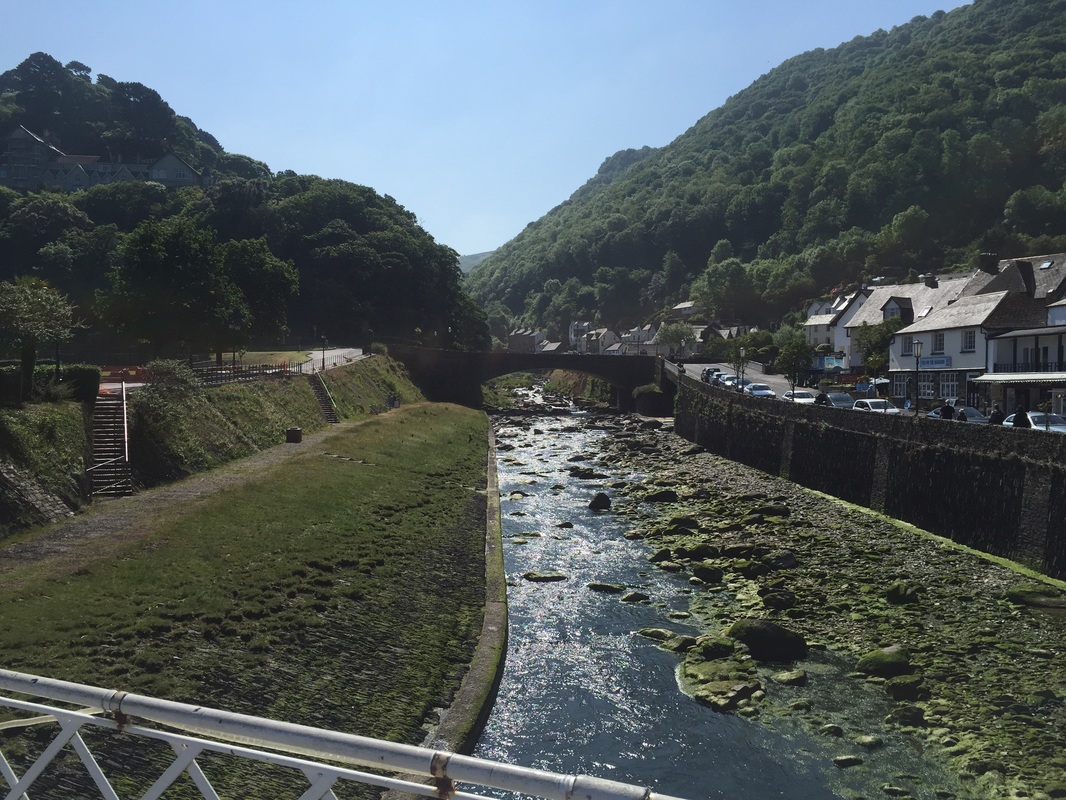
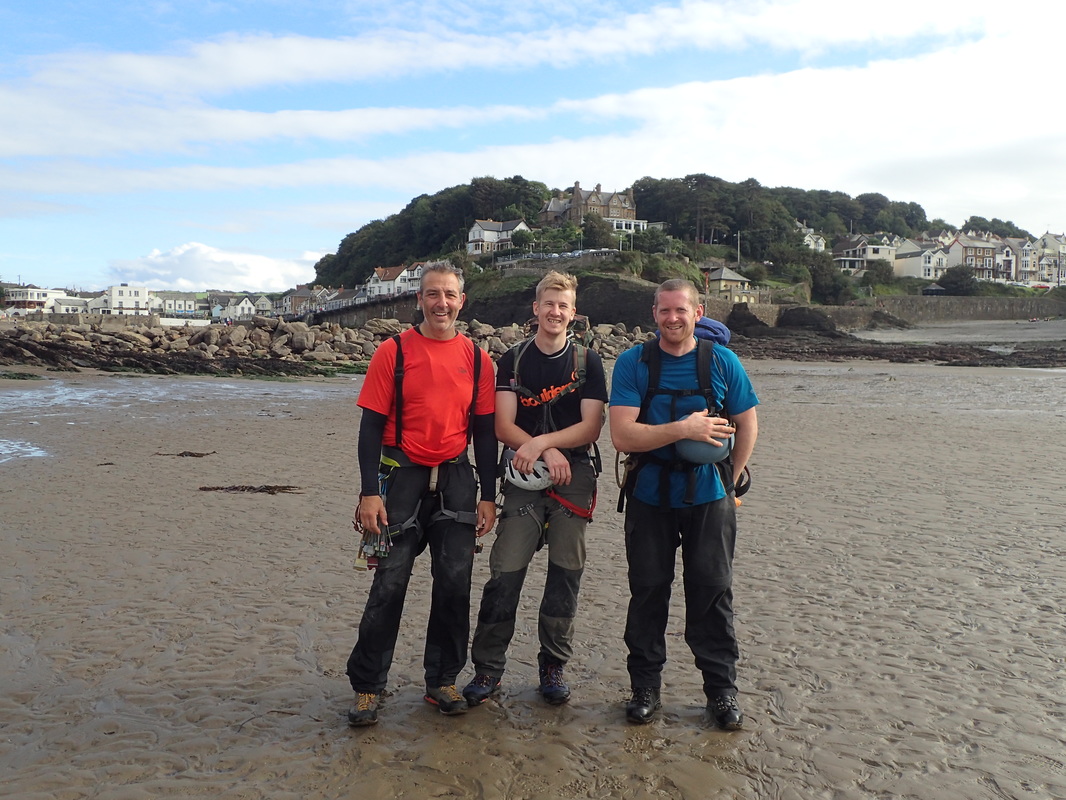
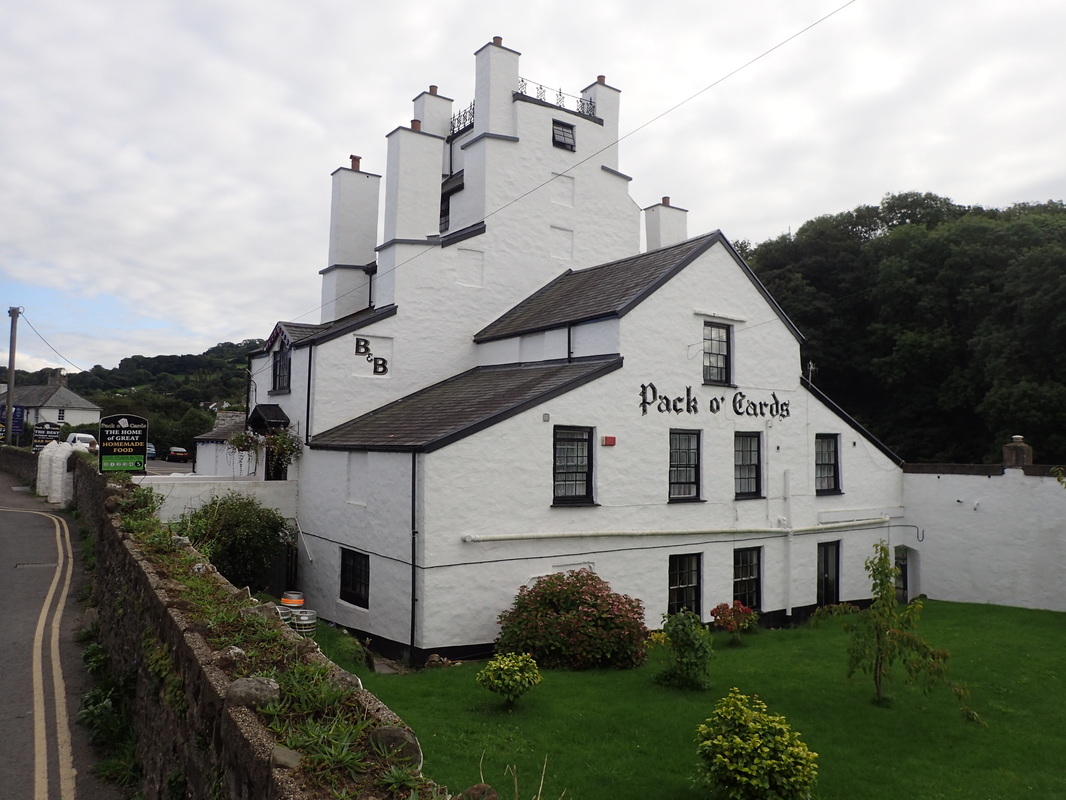
We awoke at first light to the sound of high tide approaching. The rain had stopped and as the early morning wore on, patches of blue sky began to form. With better conditions and a previously unclimbed leg now further behind us, we felt good about completing the route. The day started with tricky climbing around an inlet but then easier ground until we reached Yes Tor. This cliff has to be climbed with a choice of routes across the 100m North face. The rock is steep but well featured and with good protection. We cleared the Tor at low tide, abseiling from ledges above high tide that must have been the final bivvy mentioned in Terry Cheek's first account. After this, there was much scrambling at around the low water mark over ramps and ledges, but the difficulties we anticipated from the past description didn’t materialise. We were soon on Wild Pear Beach with the realisation that we’d made it. Suddenly feeling tired, we completed the final stretch to reach Combe Martin. After a few minutes on the beach, we walked up the main street to the Pack o’ Cards for a pint.
|

|
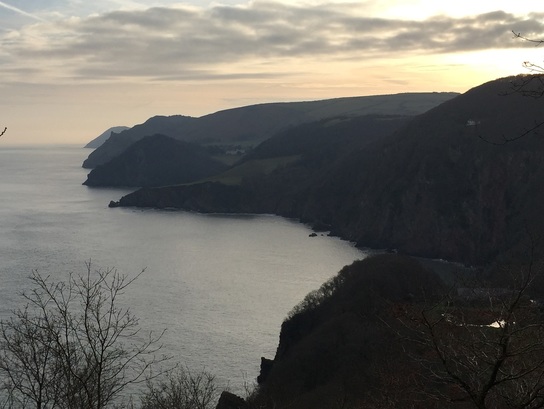
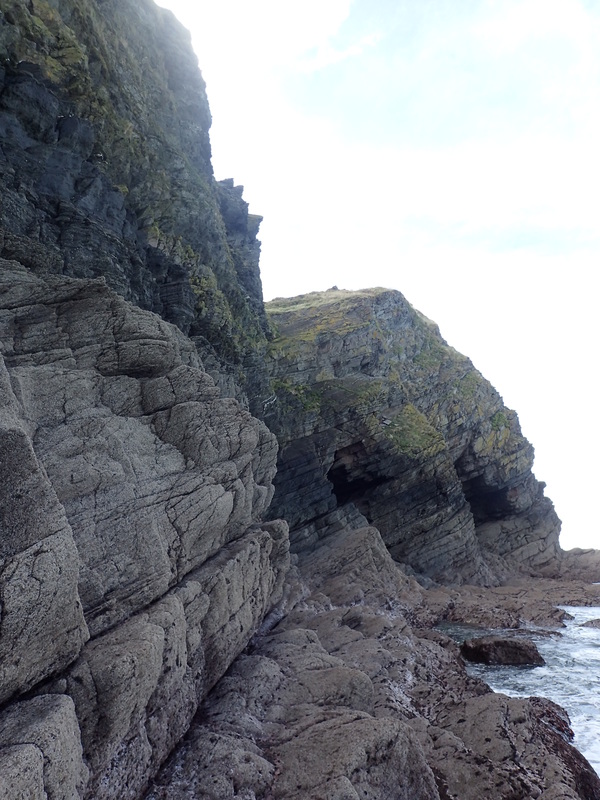
How would I describe the Traverse? The more time I spent on it, the more I came to appreciate how special it is, as well as the environment it is in. The scenery is continuously interesting and although we had completed some sections three times before, we weren't bored of them. One of the difficulties is that there is so much to see and discover, when you are pushing on to make sure you make the most of the available tidal window, you just don’t have the time to explore the environment as you would like. The bivvys do though provide a great opportunity to enjoy the remote setting and spectacular landscape.
|
|
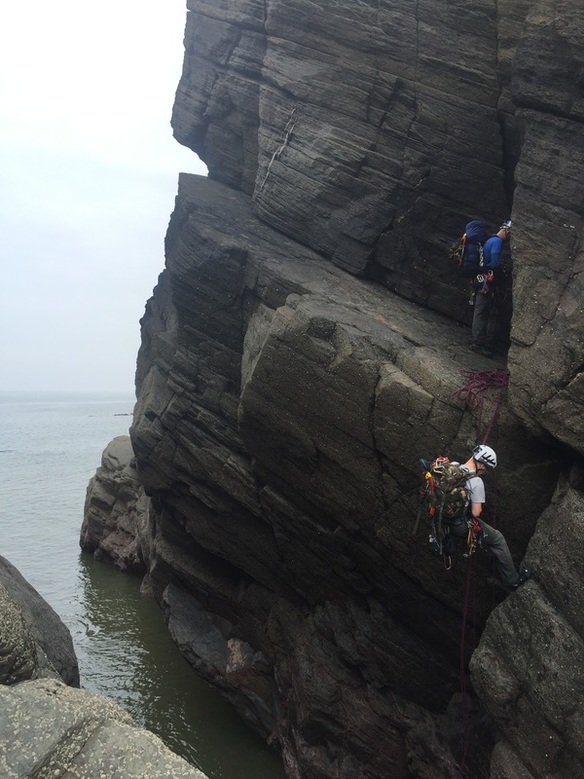
Regarding the climbing, we didn’t encounter anything above VS either and used the rope for ten pitches between VDiff and VS - plus five abseils and what would have been two Tyroleans. Regarding the time taken to complete the route, we were probably on the go for c30 hours. Based on our experience, I would say that aspirations to cover ground on the low tide at night should be reduced to making up short distances to reach a bivvy or clear a choke point – so a likely 4.5 day completion time for a team of three or four people. I couldn’t recommend committing to it as a team of two in case of an incident. To sum it up - a 25km corridor full of obstacles that fills with water twice per day…..with maybe 50 exits - many of which you wouldn’t want to use - and maybe the same number of sliding doors, that close twice a day…….with some only open for an hour or so….and you aren't sure which until you get there.
|
|
It is essential to state that this is a committing and dangerous route – between the highest cliffs in England and the second highest tidal range in the World. There are many inescapable sections, some between tidal choke points and without refuge from the sea. Should you become trapped or injured in these locations it could lead to your serious injury or death. The thought of these consequences can make the Traverse quite stressful at times, so you need to be comfortable with committing to this environment for an extended period, often moving quickly and making rapid decisions. Furthermore, over the period of time needed to complete the route, it is likely the weather will change, as will sea conditions, presenting further challenges. Because of this, you need to maintain a flexible and conservative approach as well as a willingness to modify or abandon your plans in the interests of your safety.
|
|
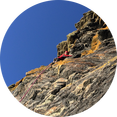
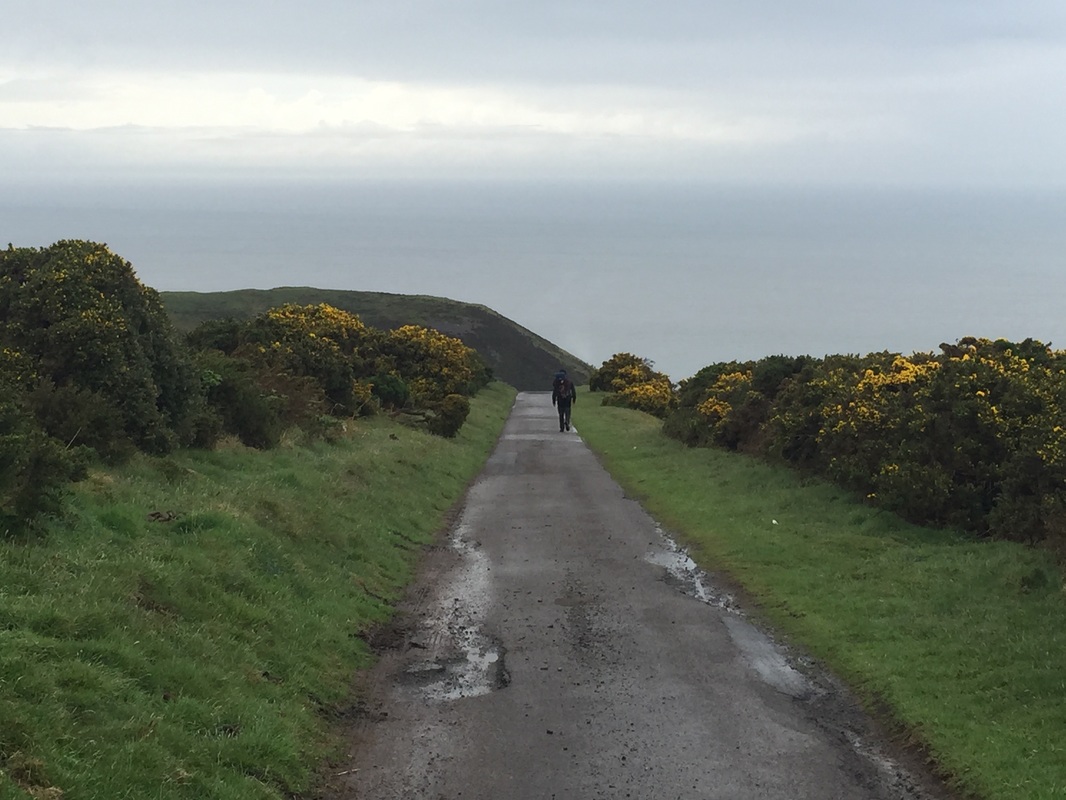
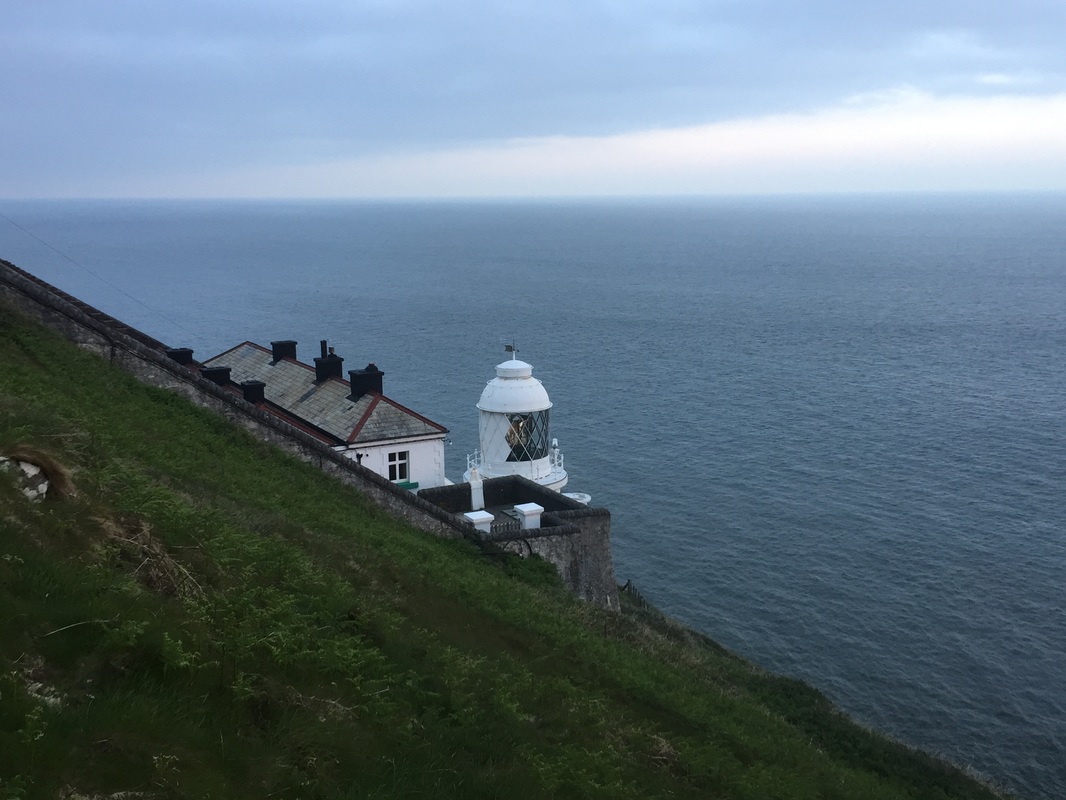
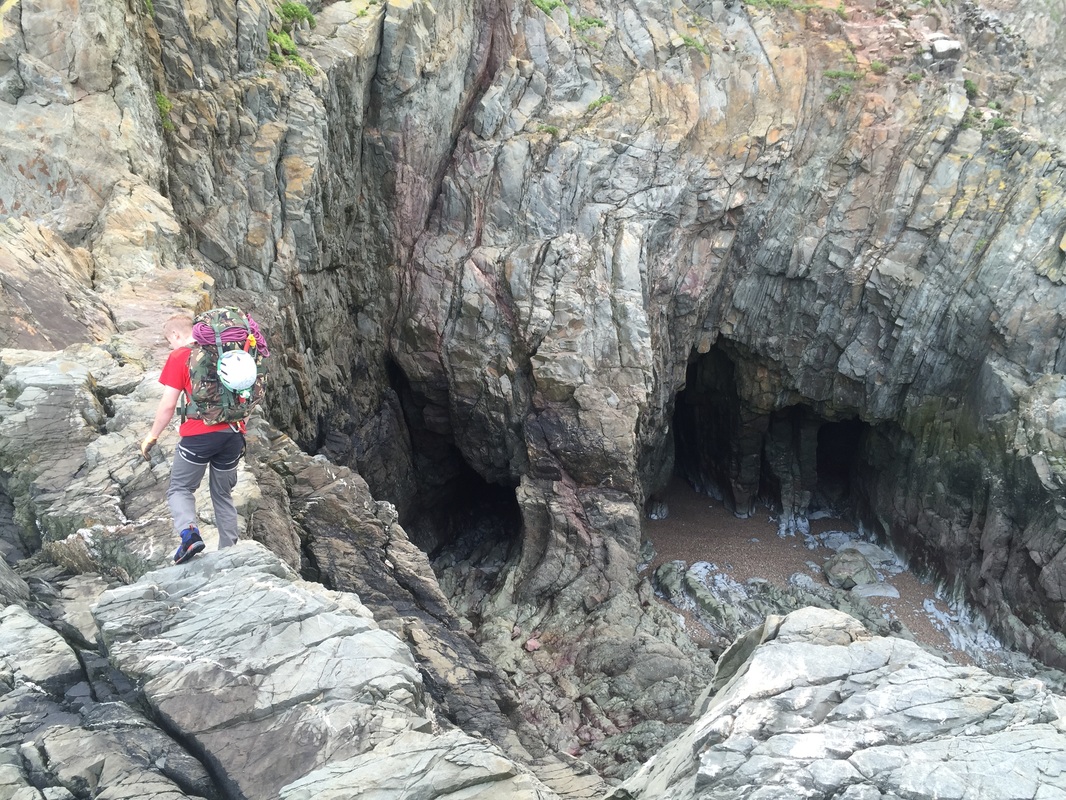
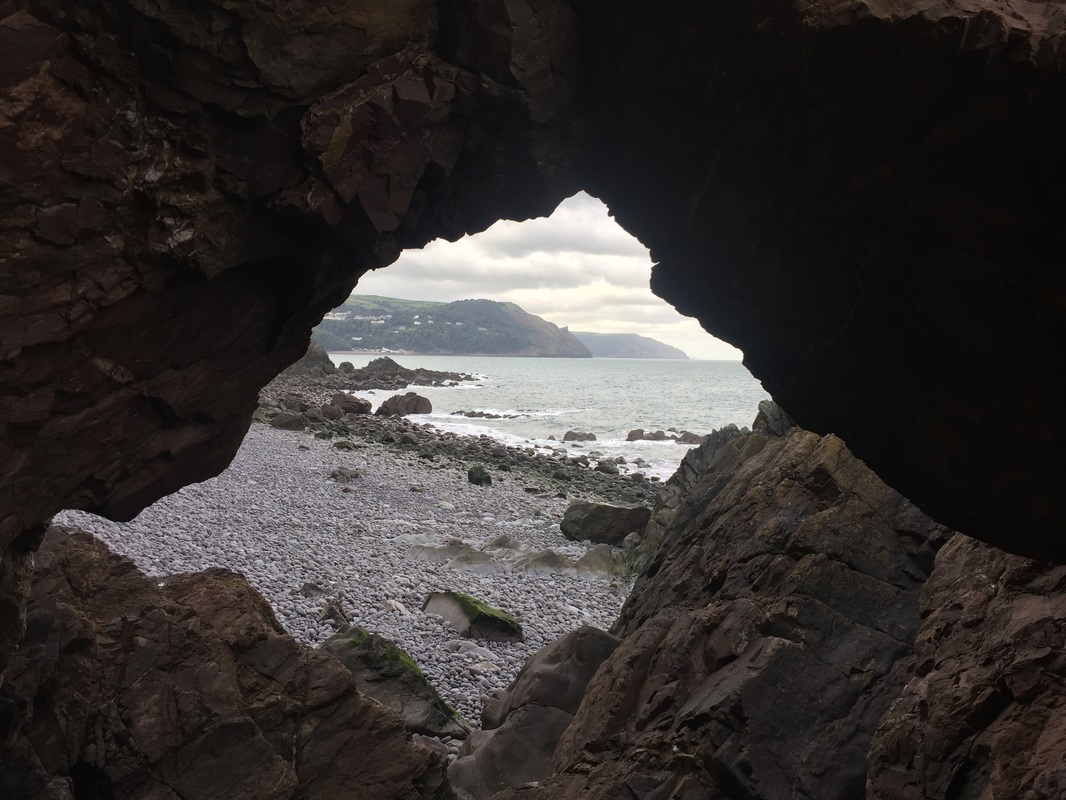
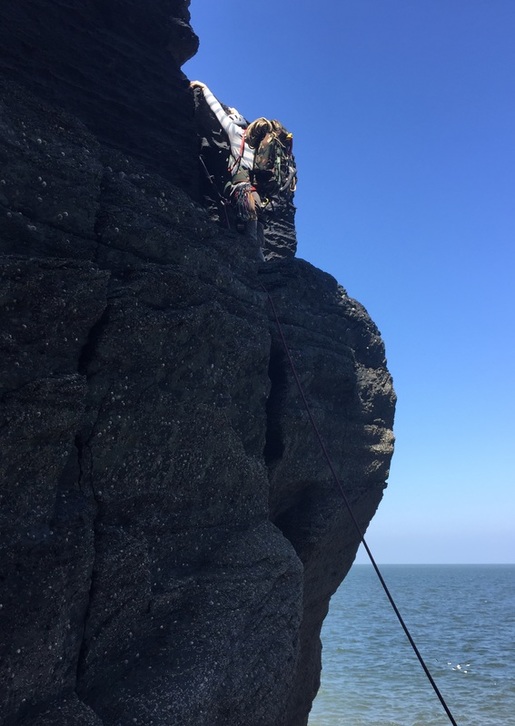
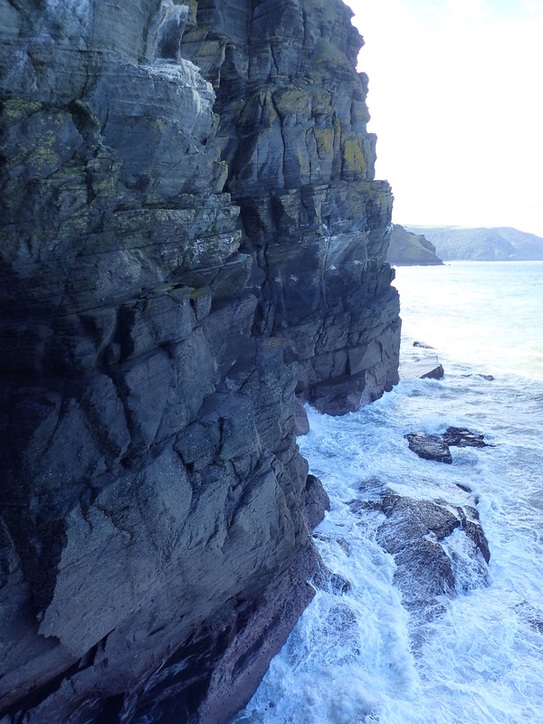
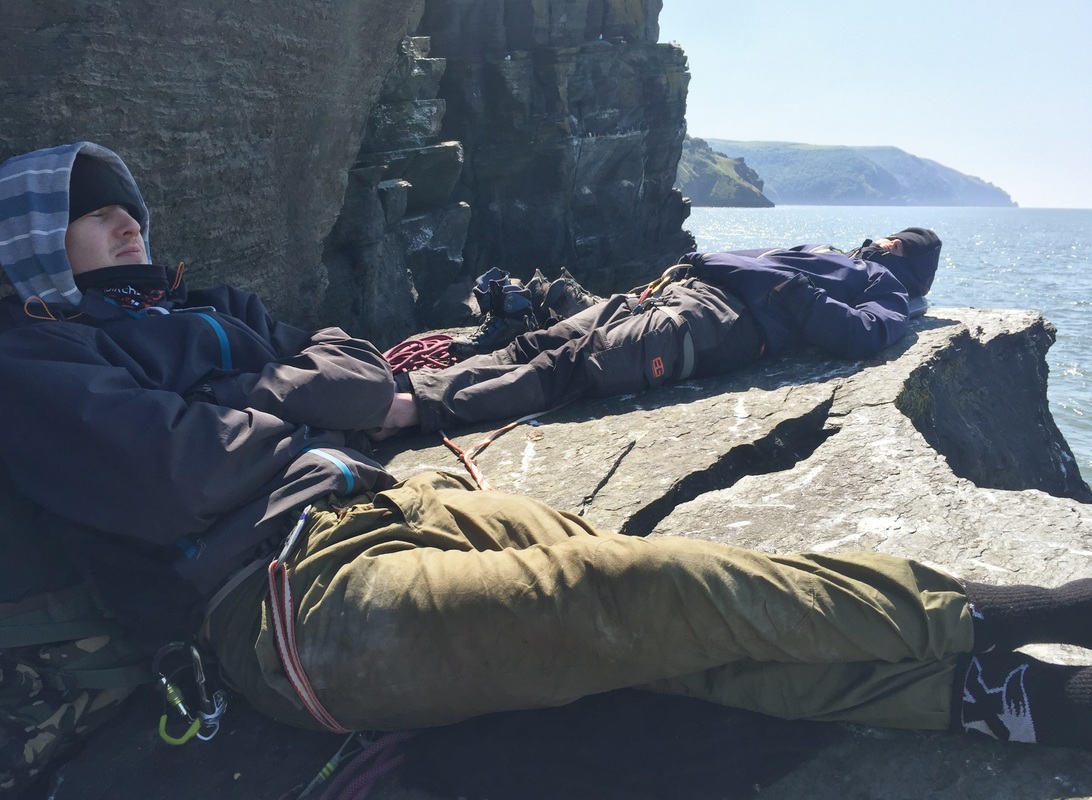
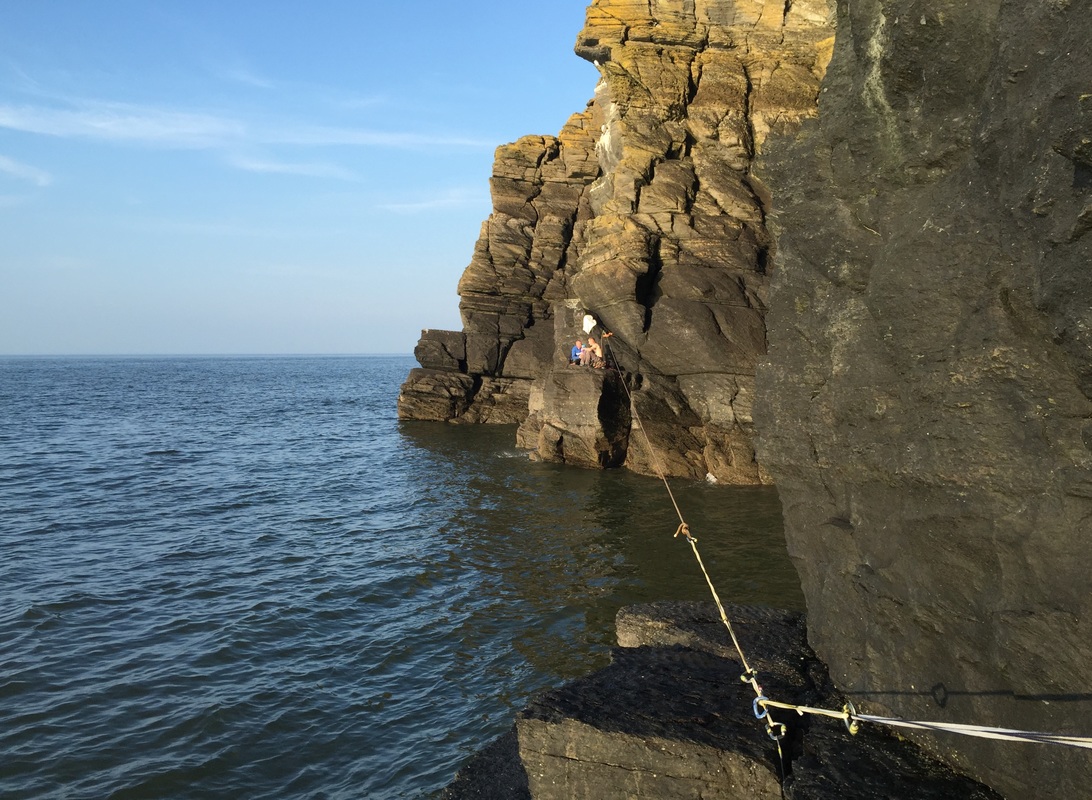
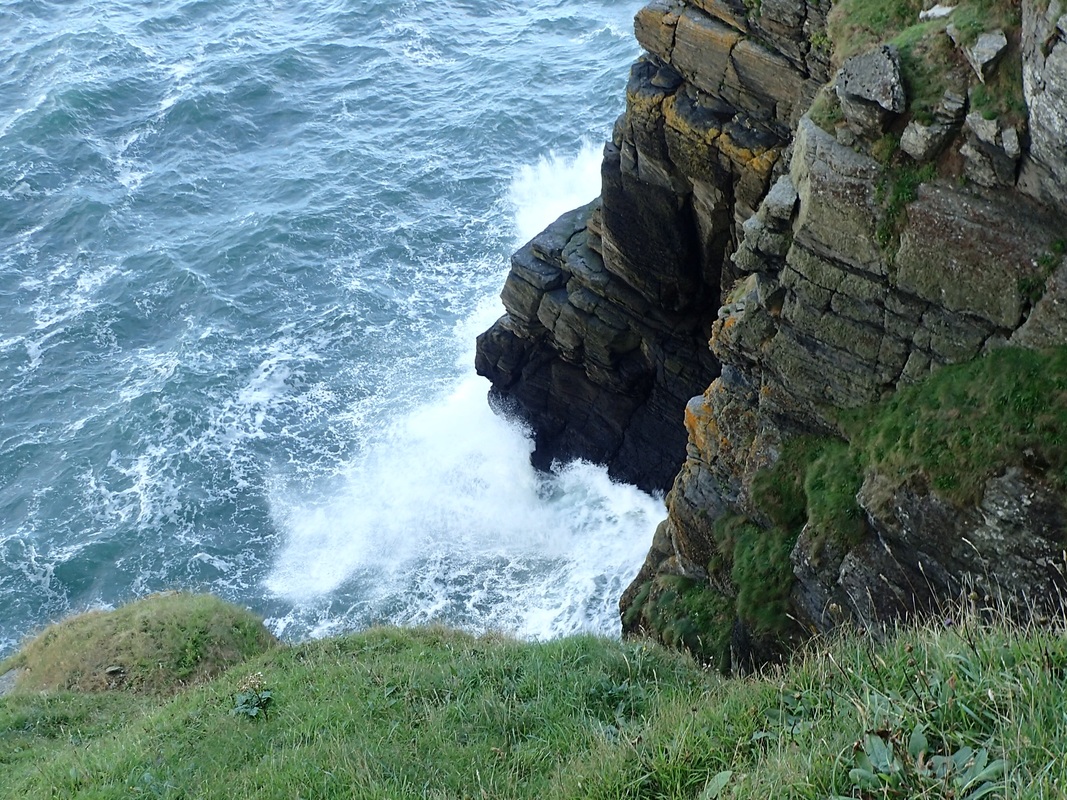
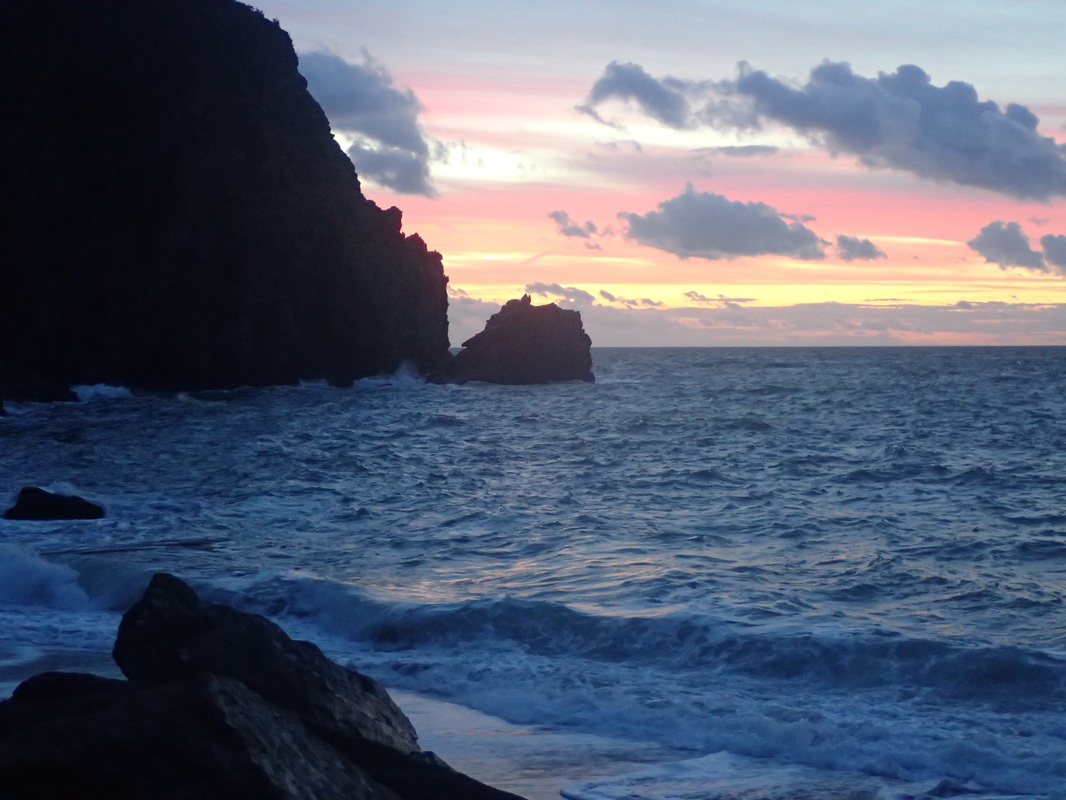
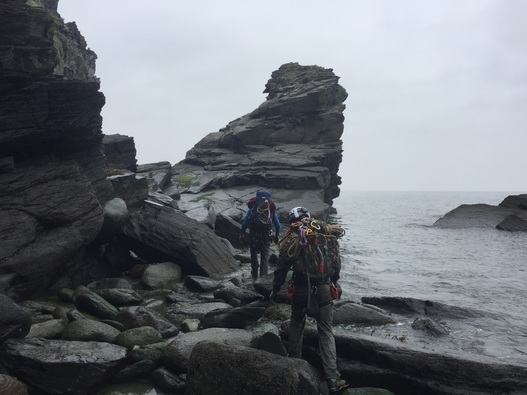
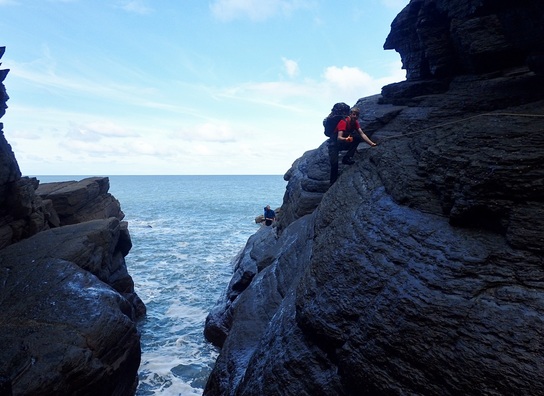
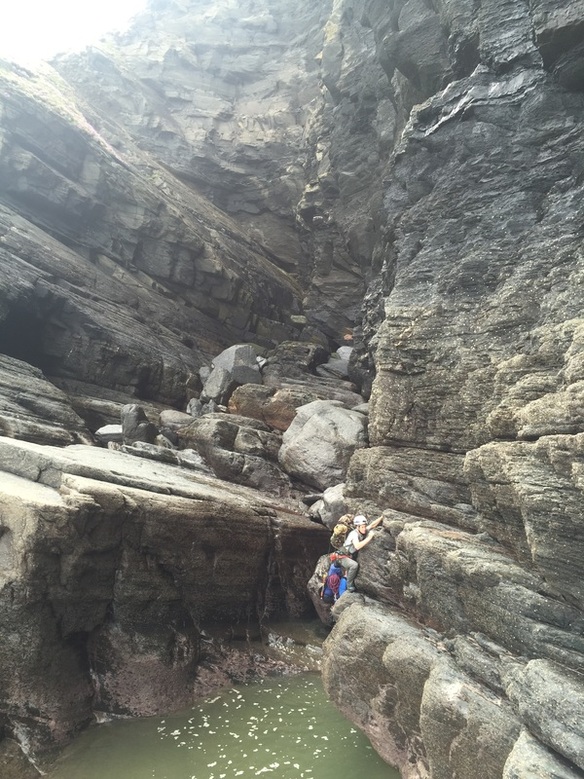
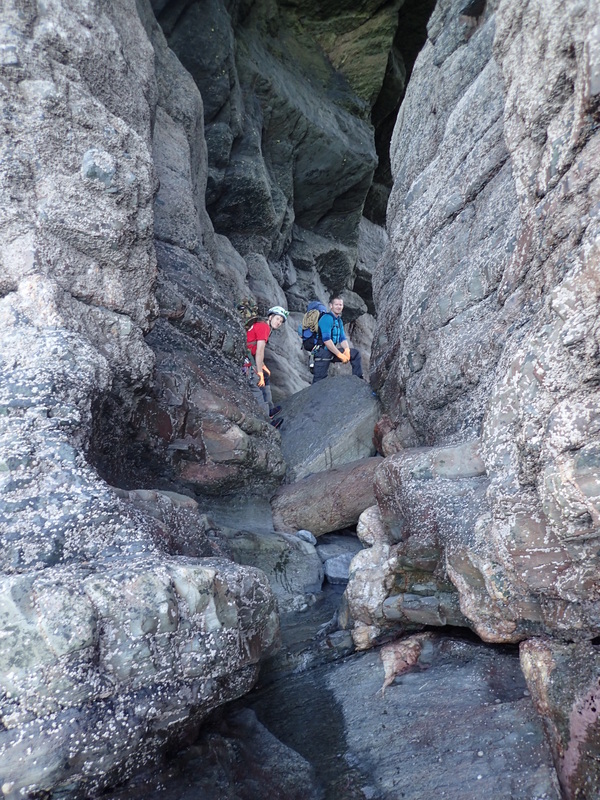
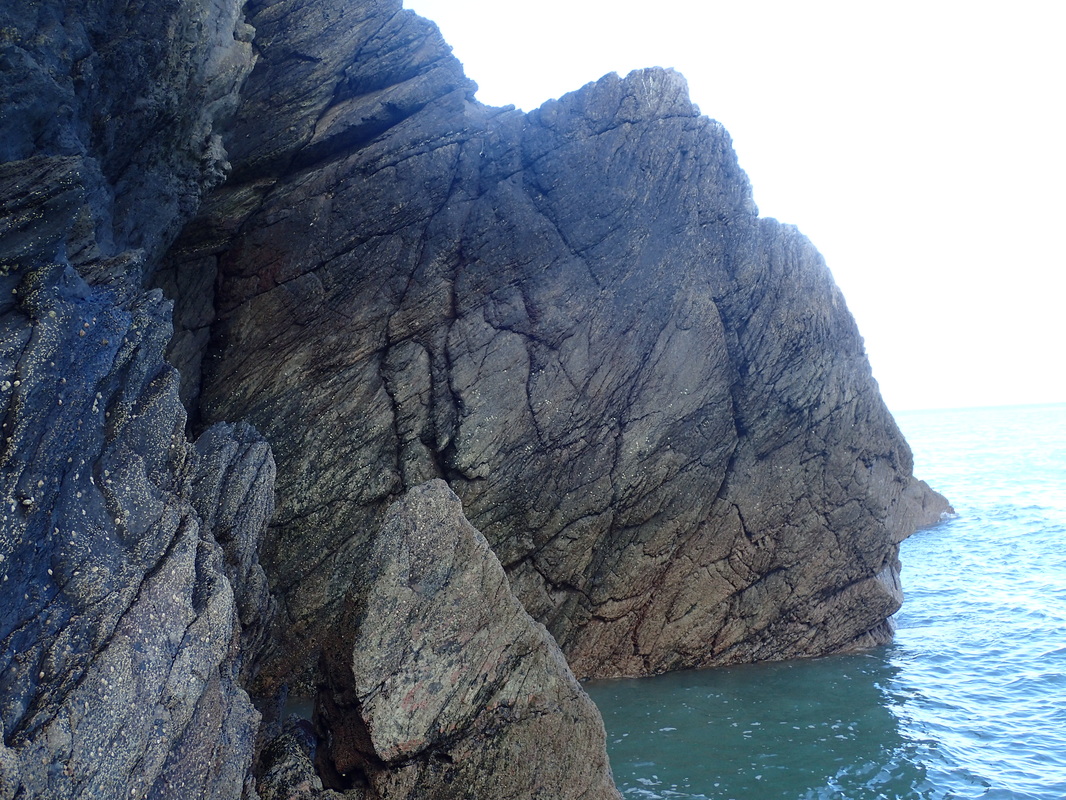
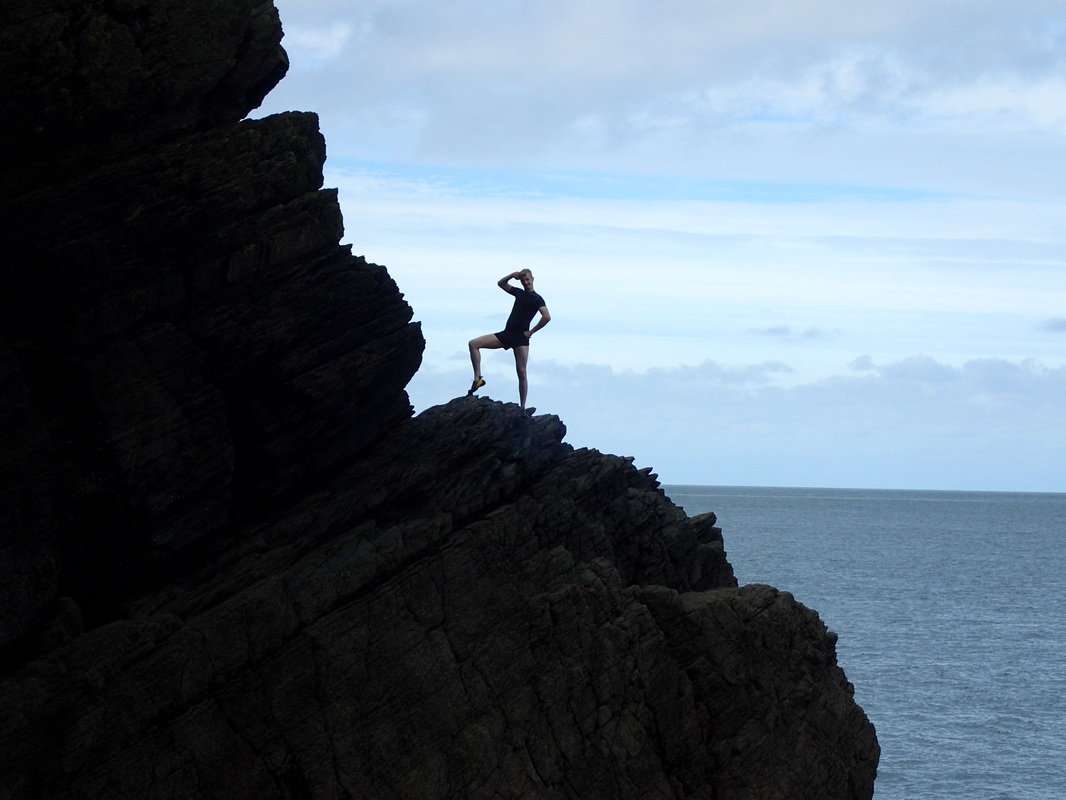
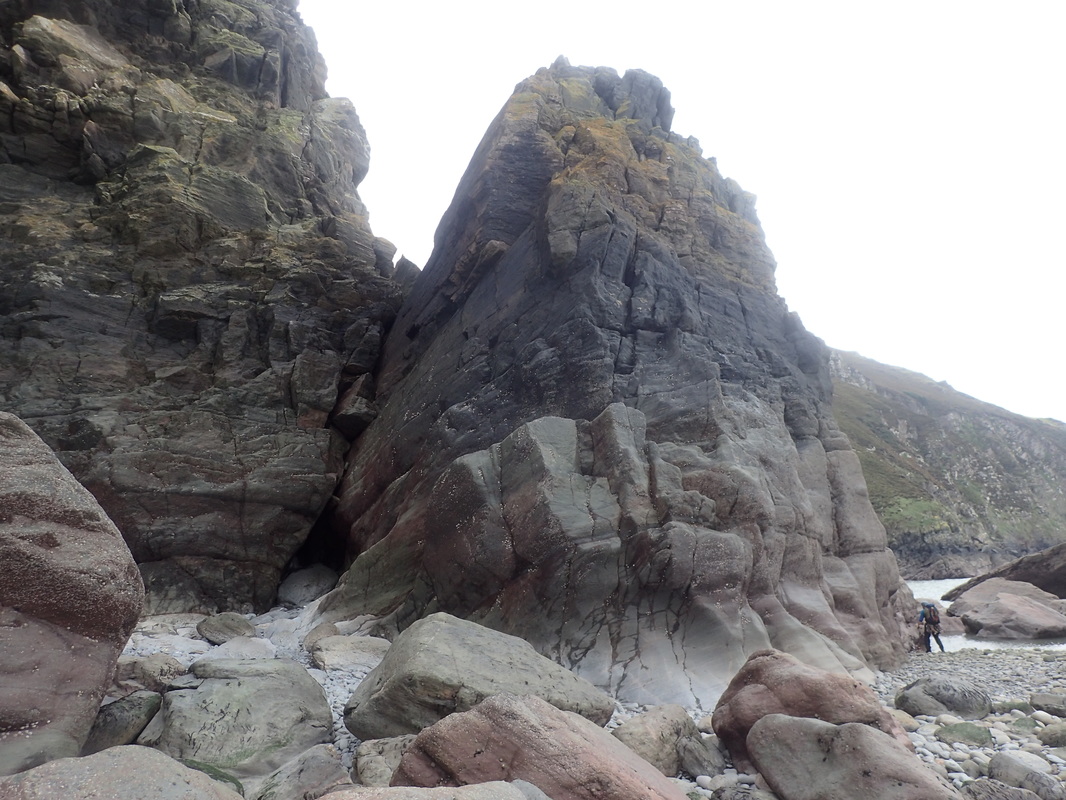
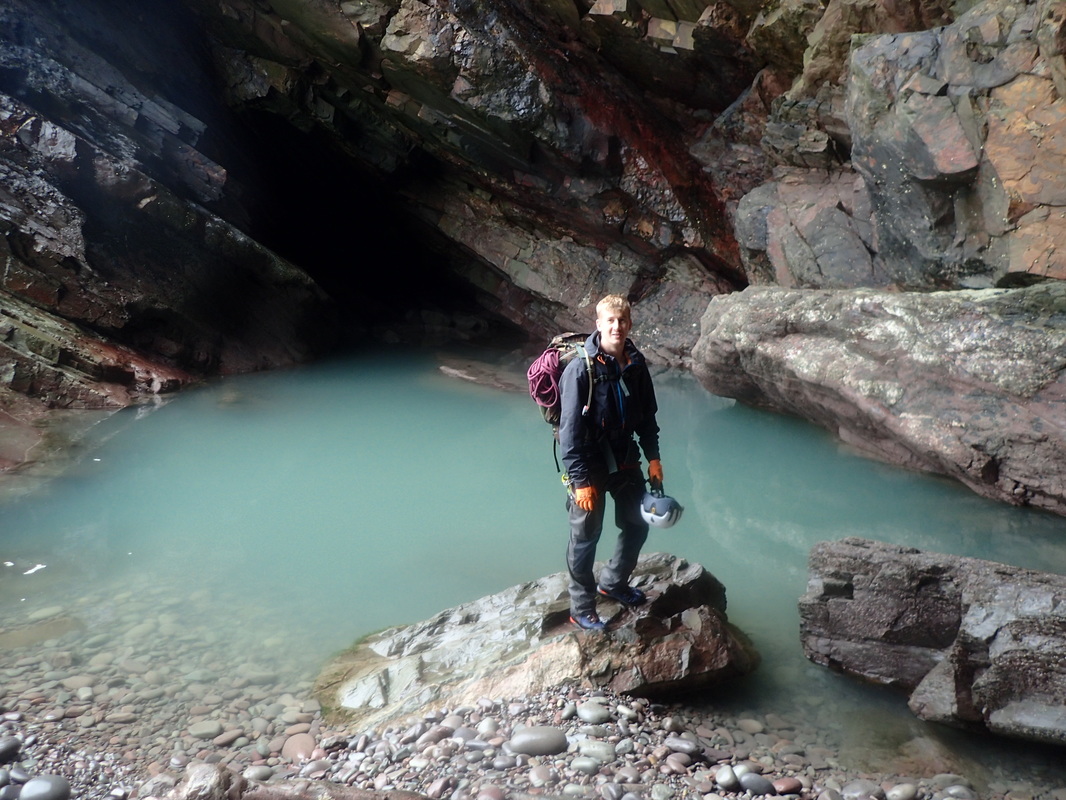
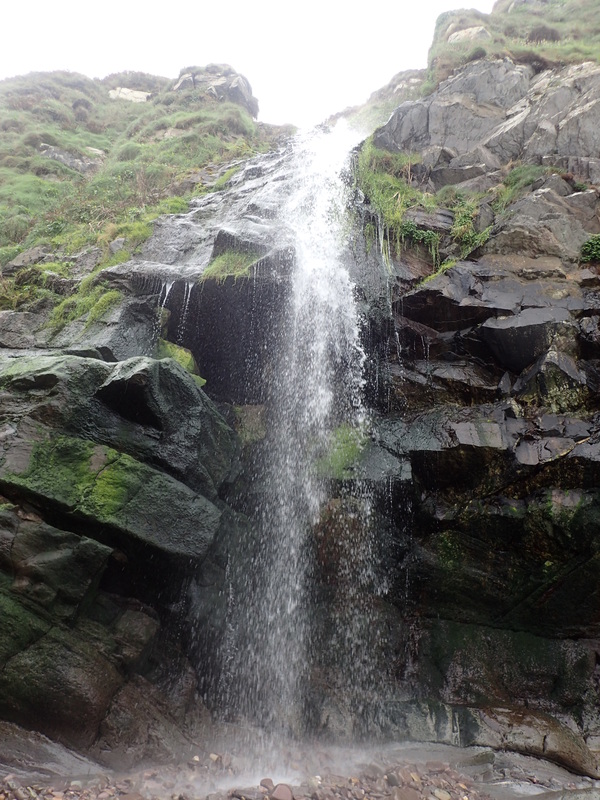
Not all the photographs on this page are from the September traverse; they have been selected from those taken on trips throughout 2016